October was nuts. We had a birthday, a trip to the Amazon and our 12th anniversary. I had been in a bit of sewing rut, but this month pulled me out of it. I made a few things for myself and sewed a lot for my kids, which was one of my goals for this year.
Showing posts with label pants. Show all posts
Showing posts with label pants. Show all posts
Wednesday, November 6, 2019


Sunday, October 6, 2019
Pattern Comparison: Liana Stretch Jeans vs. Ginger Jeans
Sewing your own jeans for the first time is intimidating, and trying to decide which pattern to start with can be one of the stumbling blocks. I've written this pattern comparison of the Liana Stretch Jeans vs. the Ginger Jeans sewing patterns to help remove one obstacle from your jeans-sewing journey. I've sewn both multiple times and am sharing my detailed thoughts on all aspects of the patterns.

Monday, July 8, 2019
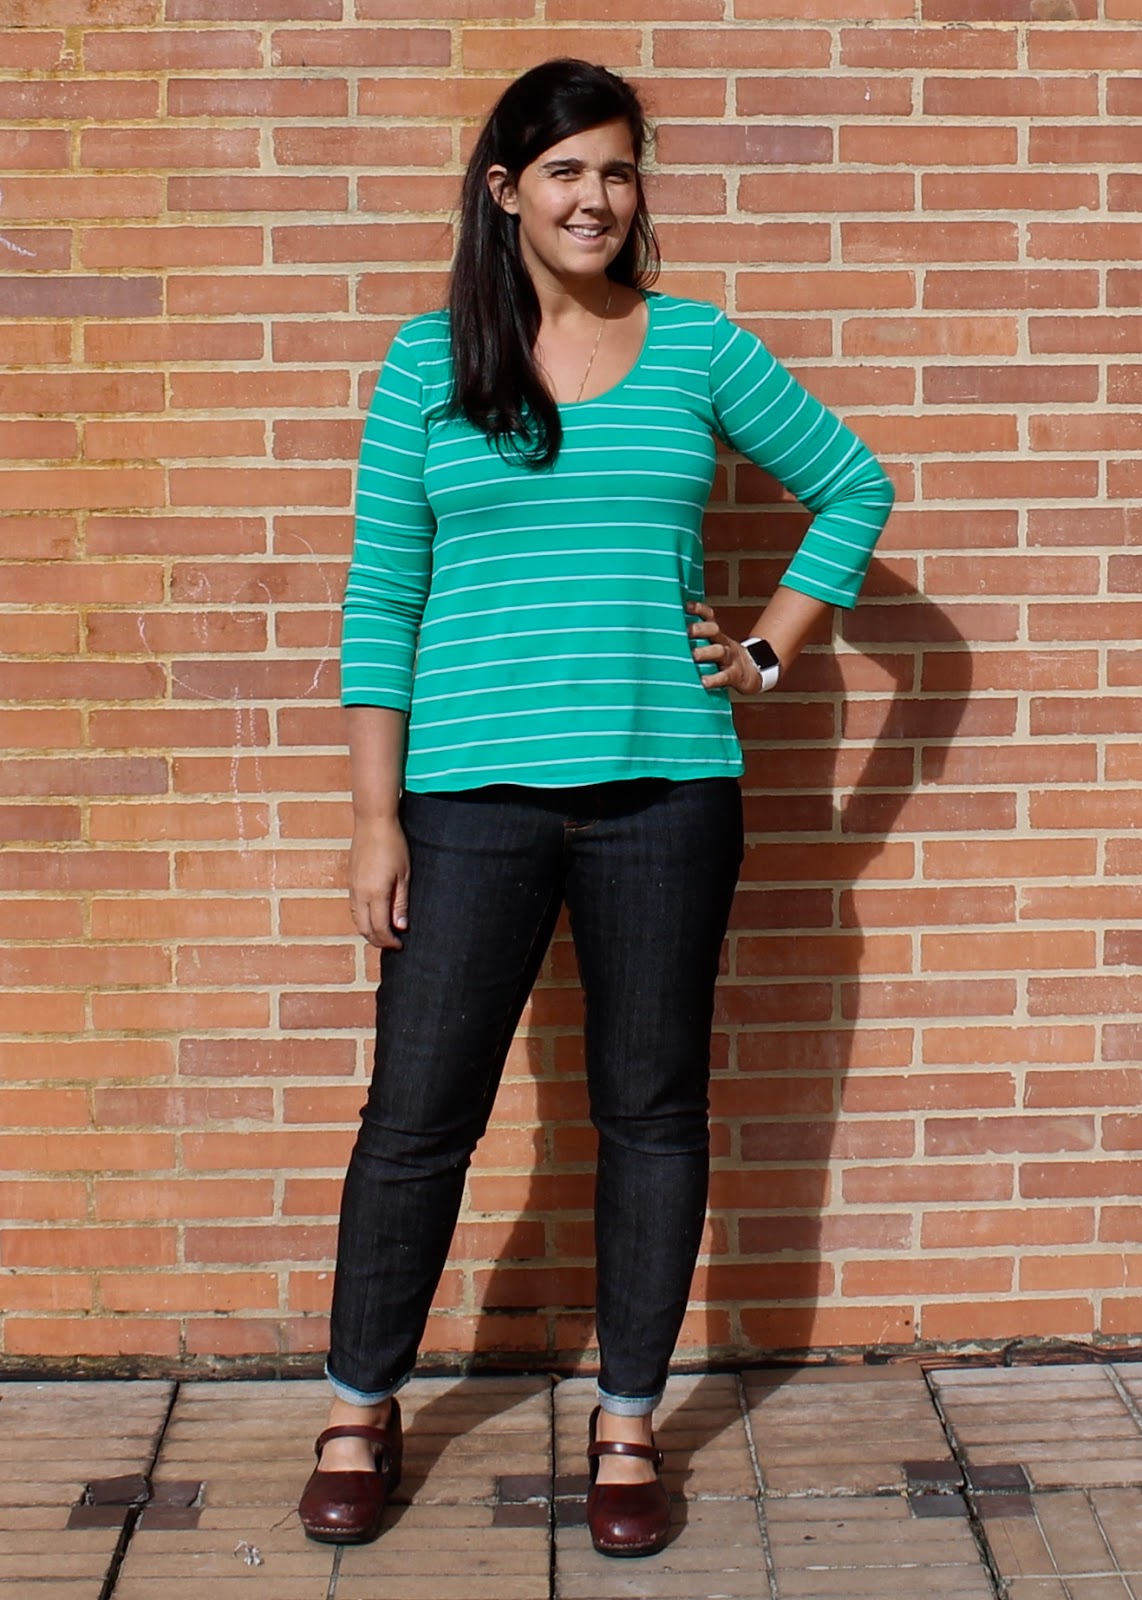
Liana Jeans #2
Monday, July 1, 2019
June 2019

This month was a little bit insane. Fueled both by the need for clothes that fit AND the knowledge that I was going to be away from my machines for all of July and August, I sewed 15 16 17 garments (19 20 21 if you count both pieces of the four two-piece sets that I made). I completed another item off my Make Nine list- the Liana Jeans - twice.
Tuesday, April 30, 2019
April 2019 and my Me-Made May Pledge

I don't have a focused Me-Made May Pledge this year. I've gone from nearly everything in my closet being made by me, to not having much that fits, and even less that is me-made. I'm hoping to continue losing weight, so trying to sew a new wardrobe quickly doesn't make too much sense either. So I will document my outfits on the days that I wear me-made, try to repeat outfits as rarely as possible, see if I can alter anything else to fit, and sew a few new things that I really need - like a pair of jeans and long-sleeved tops.
Sunday, April 7, 2019
March 2019
I made some good progress on my Make Nine goals this month. I don't know that I'll make it all the way through my Make Nine, as my priorities are already starting to shift, but I'm happy with the things I've made so far.


I'm not sure I will get to that Yuzu Coat after all, and I'm less interested in the Cynthia Rowley dress than I was when I made this list. I do still definitely want to make the Extra-Sharp Pencil Skirt and the Classic Shirt, as well as a new Traveler shirt dress.
Thursday, March 7, 2019
Cupro Cropped Calyers

Monday, April 30, 2018
April 2018 and my MMM pledge
Are you participating in Me-Made May? This will be my third year, and I've been looking forward to it for months. I feel very prepared for it this year. Like last year, I'm pledging to wear at least one me-made item every day. Additionally, I am going to try not to repeat any outfits during the month (repeating garments is ok, and necessary). I'm looking forward to the challenge, and am planning to post on IG, but probably not every day. I will post a few round-ups here. As for sewing, I'm currently redrafting my Ginger Jeans pattern to address my back leg wrinkles, and am hoping to sew up a pair or two during May.
But enough about May (at least, until tomorrow). This post is about April. It was a busy month with Easter, two weekend trips and my older daughter's spring ballet show, but I still managed to knock out a few things, including a shirt for my husband, which has been on my sewing list since we bought the fabric for it in October.
PROJECTS COMPLETED

1) Art Museum Trousers for G to replace a pair he had recently outgrown. I sewed a size 4 lengthened by 1" with enclosed welt pockets and no belt loops. I used 33" of pinstriped denim plus scraps of airplane quilting cotton. Sewed everything in 3 hours, including time to interface my welt pieces. Ended up using a hem allowance of 3/4", so I should have lengthened by 1.75" instead of 1". Width is perfect. Completed 4/4
2) Bow tie for G using this tutorial and scraps. Completed 4/4.

3) Another OOP Lisette Portfolio/Simplicity 2245 for me, using 1.89 yards of 50" wide fabric bought last July. This dress is evidence that sometimes it's good to stash fabric without a purpose. I had actually envisioned this dress in a vivid emerald green linen and kept putting it in my cart, when I remembered this cut of designer fabric that I had bought without purpose. The linen/viscose blend fabric is cool and breezy with a gorgeous drape that was better for this dress than the linen I had originally chosen. Stash win! Completed 4/10. Blog post coming soon.

4) Fairfield Button-Up as a birthday gift for J. I used 2.5 yards cotton shirting purchased in October to make this shirt. Completed 4/22. Will be blogged soon.
5) Four bodice muslins for a pattern test I'm doing. 88" used of an old sheet. Completed 4/23.
I also took in the waist and hips of my houndstooth Alberta Street skirt, which has been bothering me all year because it was just too big in those areas. It took me less than an hour and I feel like I have a whole new item of clothing in my closet.
FABRIC PURCHASES
4/21: I bought 5.33 yards of fabric to make elf costumes for my girls and my niece. I'm not sure whether they will be helping me with the sewing or not. All of it was bought at Joann's - one cut of sale yardage, and the rest from the remnant bin.
FABRIC IN/OUT
Fabric in: 5.33 yards
Fabric out: 7.75 yards
Fabric in YTD: 60.58 yards
Fabric out YTD: 48.23 yards
But enough about May (at least, until tomorrow). This post is about April. It was a busy month with Easter, two weekend trips and my older daughter's spring ballet show, but I still managed to knock out a few things, including a shirt for my husband, which has been on my sewing list since we bought the fabric for it in October.
PROJECTS COMPLETED

2) Bow tie for G using this tutorial and scraps. Completed 4/4.


4) Fairfield Button-Up as a birthday gift for J. I used 2.5 yards cotton shirting purchased in October to make this shirt. Completed 4/22. Will be blogged soon.
5) Four bodice muslins for a pattern test I'm doing. 88" used of an old sheet. Completed 4/23.
I also took in the waist and hips of my houndstooth Alberta Street skirt, which has been bothering me all year because it was just too big in those areas. It took me less than an hour and I feel like I have a whole new item of clothing in my closet.
FABRIC PURCHASES
4/21: I bought 5.33 yards of fabric to make elf costumes for my girls and my niece. I'm not sure whether they will be helping me with the sewing or not. All of it was bought at Joann's - one cut of sale yardage, and the rest from the remnant bin.
FABRIC IN/OUT
Fabric in: 5.33 yards
Fabric out: 7.75 yards
Fabric in YTD: 60.58 yards
Fabric out YTD: 48.23 yards
Wednesday, March 14, 2018
Simplicity 1563 pajama pants

Pajamas are one of those things I have never been able to bring myself to spend money on. I know, it's stupid, I could easily pick up a cute pair at Marshall's without breaking the bank. But for years, my go-to night look has been a pair of ratty pj pants (bought by my mother some 10 years ago) or ratty shorts with on old, equally ratty t-shirt that I stole from my husband. It's not a cute look.
Wednesday, March 7, 2018
Testing the Calyer Pants

Perhaps those of you who are about my age will remember the flowy rayon palazzo pants that were popular in the mid-90s. I had a pair, bought, I think, at Pier One Imports. I used to wear them with a white or gray v-neck t-shirt and my $97.52 suede Birkenstock Boston clogs. (Why do I remember how much they cost? Because I talked my parents into giving me half the money for my birthday and my father was appalled at how much I was planning to spend on a pair of shoes and didn't let me forget it for years. I'm no longer a Birkenstock kind of girl, so I don't really remember why I wanted them so badly.)
Tuesday, February 13, 2018
Layette in Blue

My kids acquired another cousin in early January. Due to illnesses (particularly the flu, which downed all four children like dominos over a two-week period), we just managed to go for a visit this past weekend.
Wednesday, December 13, 2017
Sewing for Kids: Yes, I still do!
Although this blog has become much more about my sewing for myself in the past year, I do still sew for my children. I tend to stick to easy (and comfortable) knits, and I generally sew for them in huge batches over the course of a couple of weeks, two or three times per year.
I'm gathering up a bunch of the pieces I've made recently and dumping them all in this post. It is going to be long, so bear with me.
I found this fall that Natasha (who is now 8), needed some fall/winter dresses. And when you sew for one girl around here, you kind of have to sew for the other one, so 7-year-old Z was getting a new dress, too.

My intent was to make very simple jersey dresses that were roughly knee length. But I sewed Natasha's out of a very unstable knit (probably poly and/or rayon with some lycra, though FabricMart listed it as a cotton/lycra), and the weight of the skirt pulled the bodice down much more than I had anticipated. She begged me to leave it long, and now she swishes around in what she calls her "simple dress," pretending to be a 19th century prairie girl.
I used the School Bus T-shirt pattern from Oliver+S for both dresses, in a slimmed-down size 5 for Natasha, and a straight 5 for Z. Then I cut long width-of-fabric rectangles for the skirts and gathered them up, then stabilized the waist seam with knit interfacing before sewing them together.
Of course, after I made Natasha's dress, Zoia decided that hers also needed to be ankle length. It's sewn out of a less drapey cotton interlock with a cotton/lycra jersey scrap for the neckband. It turned out a little nightgown-esque because the interlock has less drape than the jersey, but she loves it.

As my kids have grown, my ability to use up small scraps for their clothing has decreased. When the boys needed new pjs, I tried to use up most of remaining knit scraps.
I made these pjs out of a red and blue stripe cotton interlock I found at the thrift store last year. The body of Niko's shirt is a cotton rib knit that's been hanging out in my stash for awhile. The pants are Oliver+S Playtime Leggings - definitely my most-used pattern ever - in a size 4T + some length for Gabriel and size 2 for Niko. I added a cuff on the larger pair to make them even longer. Neckbands are cotton/lycra jersey scraps. G's top is the School Bus T-shirt, and Niko's is the O+S Field Trip Raglan.

The second set is made from the same patterns (both shirts are Field Trip Raglans this time) and all cotton/lycra jersey except for Niko's pants, which took out the rest of the navy rib knit.

This set, for Gabriel, is another School Bus + Playtime and is made out of striped interlock and a really nice and thick brown cotton/lycra jersey, purchased years ago from Fabric Mart.


There are a few other recent makes that I didn't manage to get pictures of - another pair of pjs and two pairs of leggings for Z and another School Bus dress for N. Coming up for the end of the year, I will have my end-of-year sewing review and some Top 5 posts that I'm looking forward to sharing with you.
Thanks for reading, and see you next time!
I'm gathering up a bunch of the pieces I've made recently and dumping them all in this post. It is going to be long, so bear with me.
I found this fall that Natasha (who is now 8), needed some fall/winter dresses. And when you sew for one girl around here, you kind of have to sew for the other one, so 7-year-old Z was getting a new dress, too.

My intent was to make very simple jersey dresses that were roughly knee length. But I sewed Natasha's out of a very unstable knit (probably poly and/or rayon with some lycra, though FabricMart listed it as a cotton/lycra), and the weight of the skirt pulled the bodice down much more than I had anticipated. She begged me to leave it long, and now she swishes around in what she calls her "simple dress," pretending to be a 19th century prairie girl.
I used the School Bus T-shirt pattern from Oliver+S for both dresses, in a slimmed-down size 5 for Natasha, and a straight 5 for Z. Then I cut long width-of-fabric rectangles for the skirts and gathered them up, then stabilized the waist seam with knit interfacing before sewing them together.
Of course, after I made Natasha's dress, Zoia decided that hers also needed to be ankle length. It's sewn out of a less drapey cotton interlock with a cotton/lycra jersey scrap for the neckband. It turned out a little nightgown-esque because the interlock has less drape than the jersey, but she loves it.
The School Bus pattern has gotten a workout here lately. I used it to make cotton interlock nightgowns for my daughters and oldest niece (hers is not pictured, but it's a tank version of the same nightgown). These are constructed just like the dresses, but with an added ruffle at bottom.

As my kids have grown, my ability to use up small scraps for their clothing has decreased. When the boys needed new pjs, I tried to use up most of remaining knit scraps.
I made these pjs out of a red and blue stripe cotton interlock I found at the thrift store last year. The body of Niko's shirt is a cotton rib knit that's been hanging out in my stash for awhile. The pants are Oliver+S Playtime Leggings - definitely my most-used pattern ever - in a size 4T + some length for Gabriel and size 2 for Niko. I added a cuff on the larger pair to make them even longer. Neckbands are cotton/lycra jersey scraps. G's top is the School Bus T-shirt, and Niko's is the O+S Field Trip Raglan.

The second set is made from the same patterns (both shirts are Field Trip Raglans this time) and all cotton/lycra jersey except for Niko's pants, which took out the rest of the navy rib knit.

This set, for Gabriel, is another School Bus + Playtime and is made out of striped interlock and a really nice and thick brown cotton/lycra jersey, purchased years ago from Fabric Mart.

Natasha also needed some pants, so I made two more pairs of Playtime Leggings for her. These are a size 4 with the length of an 8. Next time I'm going to make the 5 plus length for her. The gray ones are French terry with cotton/lycra jersey knee patches, and the black are cotton/lycra jersey.


Last, I wanted to use up the less-than-a-yard of this flannel from Joann's that I used on my Bonn No. 5. I also didn't want to buy a new pattern. So I flipped through my one issue of Ottobre Design (Winter 6/2015), and found the Tiny Pussy Bow blouse, #21. I traced it out in a size 110 with the armhole height of a 128 and the length of the 134. I left off the pussy bow and just bound the neckline. I wanted a bit of extra length so I added a ruffle at bottom. I had so little fabric left that I had to piece that ruffle in five sections. N loves the shirt and I feel good, having used up every scrap of fabric.

This pattern only has five pieces, which makes the tracing more tolerable. The instructions were fine, and it went together quickly. My only quibble is that the yoke is a single layer. I didn't cut it on the bias because I was afraid it would distort without a facing. But in this thick fabric, cut on grain, it works fine. The pattern has a tiny bit of gathering at the front shoulder, which is hard to see in this fabric. The back is supposed to be gathered too, but I decided to do an inverted pleat instead. I'm very happy with this make.

There are a few other recent makes that I didn't manage to get pictures of - another pair of pjs and two pairs of leggings for Z and another School Bus dress for N. Coming up for the end of the year, I will have my end-of-year sewing review and some Top 5 posts that I'm looking forward to sharing with you.
Thanks for reading, and see you next time!
Wednesday, July 26, 2017
Linen pants
This year I started making seasonal sewing plans, trying to both use up some fabric from my stash, and create coordinates that I could mix-and-match. Most recently, I sewed what I guess could be trendily termed a "micro-capsule," which involved the two Pony tanks I posted about here, and this new pair of linen pants.

They are McCall's 7364, sewn out of this always-reliable slub linen from Joann's. I had in mind a particular idea for the pants I wanted, and this basic pattern seemed something that was pretty close and that I could tinker with until I got them where I wanted them. I liked the shape of the pant on the pattern envelope, as well as the front pocket on the shorts view. I knew I didn't want a drawstring waist (I never find that they stay up), but I planned to put a knit yoga waistband on the pants anyway.

So I made view E, the long pants, but with the pockets of view A, and I ended up cropping them a few inches. I cut a size XL according to my measurements (which correspond with a 20 - the XL is 20/22) and they were way too big. I should have taken a photo because my muslin looked like legit clown pants. I ended up cutting down the side seams to about the size L and then continued trying on the pants, pinning, and resewing the seams. From the size L, I made the following adjustments, some in the muslin phase, and others to the final pants while in progress:

I realized after washing and putting on these pants again, though, that I had done a lot of my alterations after the pants had already bagged out quite a bit - being linen, there is no recovery. So the just-out-of-the-wash pants (photographed with an olive green tank top) are a touch tight in the thighs. They do relax into the shape I want relatively quickly (see all the other photos).

My finished yoga band, made of cotton/lycra rib, is about 2" wide, and threaded through with 2" wide elastic. It's very comfortable and stays put. I originally tried to make a knit-fabric-only band that was wider (you can see it in the photo below, of the pants after I've worn them a bit), but they didn't stay up. So I had to cut the band down to fit the elastic I had.

I loved the shape, the length, and the breezy linen. The bum is a little baggy as seen below, but I always wear a longer top with them, so no one is looking at this view.

The back pockets are a bit too small; if I make these again I should enlarge them. But I really like the shape of the front pockets.

Since finishing these pants about four weeks ago, I've worn them at least twice a week. They are very comfy for our hot and sticky weather, and if I had time (I don't), I'd make another pair. I'm halfway through three men's shirts I need to make before we got to the beach in 2.5 weeks, so it's unlikely I'll be doing any more selfish sewing this summer. Luckily, I've already kitted my vacation wardrobe out pretty well this summer (see here, here, here, and here).

Thanks for reading, and see you next time.

They are McCall's 7364, sewn out of this always-reliable slub linen from Joann's. I had in mind a particular idea for the pants I wanted, and this basic pattern seemed something that was pretty close and that I could tinker with until I got them where I wanted them. I liked the shape of the pant on the pattern envelope, as well as the front pocket on the shorts view. I knew I didn't want a drawstring waist (I never find that they stay up), but I planned to put a knit yoga waistband on the pants anyway.

So I made view E, the long pants, but with the pockets of view A, and I ended up cropping them a few inches. I cut a size XL according to my measurements (which correspond with a 20 - the XL is 20/22) and they were way too big. I should have taken a photo because my muslin looked like legit clown pants. I ended up cutting down the side seams to about the size L and then continued trying on the pants, pinning, and resewing the seams. From the size L, I made the following adjustments, some in the muslin phase, and others to the final pants while in progress:
- Took in the side seams evenly at about mid-hip down to my knee by 3/8".
- Took in just the back piece side seam about 1" starting at mid-hip and ending a few inches above the hem.
- Raised the back by 1" at center and shortened the front rise by 1".
- Scooped out the back crotch curve by about 3/8".
- Took in both the front and back center seams by about 1" at the top, tapering to nothing halfway down.
- Took in just the back inseam by 1" at the crotch curve, tapering to nothing about 8" or so down.

I realized after washing and putting on these pants again, though, that I had done a lot of my alterations after the pants had already bagged out quite a bit - being linen, there is no recovery. So the just-out-of-the-wash pants (photographed with an olive green tank top) are a touch tight in the thighs. They do relax into the shape I want relatively quickly (see all the other photos).

My finished yoga band, made of cotton/lycra rib, is about 2" wide, and threaded through with 2" wide elastic. It's very comfortable and stays put. I originally tried to make a knit-fabric-only band that was wider (you can see it in the photo below, of the pants after I've worn them a bit), but they didn't stay up. So I had to cut the band down to fit the elastic I had.

I loved the shape, the length, and the breezy linen. The bum is a little baggy as seen below, but I always wear a longer top with them, so no one is looking at this view.

The back pockets are a bit too small; if I make these again I should enlarge them. But I really like the shape of the front pockets.


Thanks for reading, and see you next time.
Sunday, April 9, 2017
Ginger Jeans for a spring capsule wardrobe

Last month I found myself very inspired by the way my striped Blackwood cardigan seemed to invigorate my wardrobe. It goes well with several skirts I had made over the previous year as well as with my first pair of Ginger jeans. I decided it was time to inject my wardrobe with some versatile basics. I knew I wanted to use up a cut of navy and cream houndstooth twill that was in danger of languishing in my stash if I didn't sew it soon, and quickly, a capsule wardrobe plan emerged.


Well.
I began these on a Saturday and I finished them on a Thursday. My kids did eat the contents of random cans in the pantry and half-finished freezer items on two of those days, so there's that. Mama needed some new jeans.
These are View A of the pattern again - the low-rise, stovepipe leg version. I cut these in a size 16 with a scooped out back crotch curve and a higher yoke (I raised it 1" at the highest point). (With the higher yoke modification, I don't find these to be overly low in rise. I think any higher would feel restrictive on my tummy, actually.) They were tiiiiiight. My previous pair, which I took in considerably, was made out of super-duper stretchy denim. This pair was made out of a more respectable Japanese stretch denim that holds it shape spectacularly. I had to let out the waist and hips 1/2" on each side.

I tried the full inner thigh adjustment that I fudged on my last pair. It didn't seem to help my back knee wrinkles much, but it did cause some crazy inseam migration to the front of the leg. I actually topstitched my inseam with navy thread instead of gold because of how much it twists to the front. The side seam is perfectly straight, so I know it's not leg twist caused by cutting off-grain (plus I was very, very diligent in cutting my pattern pieces on grain). Anyway, I guess full inner thigh isn't the main problem. I ended up letting out the back leg only from the knee down, and that took care of a lot of the wrinkles. After I did that, I took in the legs evenly at the side seams, from the lower thigh all the way down. Looking at these photos, though, I think the lower leg is still a little baggy for my taste. I may go back and take the seams in a bit more. Like last time, I also found that I needed to shape the side seam to follow the weird curve of my knee, in below the thigh and back out again to the calf, to get rid of some of the wrinkles. Maybe my issue really is knock knees, and not full inner thighs? Next time I plan to lengthen the inseam by 1" to try to address a possible knock-knee issue.

I did not interface the waistband and I used self-fabric for the facing because I wanted it to be stretchy. I forgot to lengthen the pattern, and so I ended up adding fabric to the bottom for a total of 1" added. I topstitched it right where I added the fabric, and the addition isn't at all noticeable. I need to remember, if I ever boot-cut-ize this pattern, to lengthen another inch beyond that at least.
I have to mention how easy it was to install this zipper. When I read in the instructions that I would likely have to shorten the zipper, I panicked a bit. I remembered reading blog posts where people had talked about using pliers to remove the metal teeth from the zipper so they could sew a seam and I was intimidated. But the instructions noted that I could just sew through the zipper - and I did. And then I shortened it by cutting it with scissors, which blew my mind. Metal zippers = not so scary.

My machine did not like the topstitching thread I ordered from Taylor Tailor - one ply of the thread kept breaking, and then bunching up through the needle. I did not have this problem with the navy Guterrman topstitching thread I used for the inseam. I gave up on topstitching thread when it came to the buttonhole and just used regular thread.

I think I want to try Heather's larger pocket pattern piece the next time I make these. I think my back view would benefit from larger pockets.

I put three rivets in these jeans at the front but I didn't get any photos of them so you'll have to take my word for it. They were not difficult to put in, though I found it tedious and time consuming to make a large enough hole through the coin pocket corner, to push my rivet post through. That probably took me 30 minutes, while the actual hammer-and-cast-iron-pan installation only took five. No longer afraid of rivets and jeans buttons!

I'm feeling pretty good about the rest of my capsule spring wardrobe - now that the most difficult and time-consuming project has been completed, it should be smooth sailing for the five remaining pieces I plan to make.

When I took these photos, I had worn these jeans for two full days with zero bagging out. I didn't put belt loops in because I prefer not to wear belts unless absolutely necessary, and I find that tees lie smoother over a belt-loop-less waistband. Based on how well this denim has held its shape, I don't think that I will need to add them. Might have to pick up some more of it - do you think it's acceptable to make two pairs of jeans out of the exact same fabric? If I did, I'd probably try a mid-rise bootcut variation.
If you enjoyed this post, you might like to read about all the other Ginger Jeans I've sewn (including with a pull-on waistband hack). You can find those posts here. As always, thanks for reading and I'll see you next time!
Monday, February 6, 2017
Ginger Jeans
I FINALLY MADE JEANS! To be precise, I sewed the Ginger Jeans from Closet Case Patterns. And I hacked them to have a pull-on waistband.

Sunday, December 11, 2016
Just do it
It has been so long since I've posted here, that I was afraid if I didn't put something up soon, I'd never post again. This fall and winter have been a little nuts. My brother got married at the beginning of November, and I spent the last two weeks before the wedding finishing up all the junior wedding party clothing, as well as making the cake. I've done tiered cakes before, but this was my first four-tier, and my first wedding cake. This sucker served 150 people.

It was an almond cake with raspberry filling and almond buttercream frosting, covered in fondant. The ribbon was satin to match the bridesmaids' dresses, and the pearls (more than 300!) were hand rolled by me. This was such a huge job, but I was so proud of the finished product, and more importantly, the bride and groom really loved the cake.
But that's not why you're here ... so on with the sewing. Today I'm going to post the boys' outfits, and hopefully I'll get the details up about the girls' later this week.

I sewed three pairs of pinstriped gray brushed twill Oliver+S Art Museum trousers, three satin bow ties and three pairs of black suspenders. I can nearly sew these pants in my sleep now, I've made so many of them. I bought the fabric from Cali Fabrics - it's a lovely sturdy fabric with a soft brushed texture; really perfect for little boys' winter pants. I WAY overbought, and have enough left to make myself a skirt and then some. The bow tie tutorial, which I've used before, came from Make It Love It, and I used this suspender tutorial. Though for the money I spent on the necessary hardware, I could have purchased ready-made suspenders from Amazon and saved myself a couple of hours. For black suspenders, it was not worth the effort.

For the trouser welt pockets, I used the method from the Alina & Co. Chi Town Chino Expansion Pack, which fully encloses the pockets. Alina's method uses French seams, but I decided mid-way through making these, that a serged seam would work just fine. I also put little surprises in the pockets for the boys:

I was so busy during the wedding that I was not able to take any photos, and there weren't any good ones of just the three boys. G was the only one of the boys who made it to the reception, and he was a dancing fool.

He even kicked off his shoes midway through the evening.

Though by the end he was just plastered onto me and refused to let me out of arms' reach.


See you back here soon with photos and details of the girls' dresses!
Monday, September 26, 2016
I made pants!
Here is a rare situation where I bit off more than I thought I could chew and it actually turned out really, really well.

While on vacation last month, I saw the tester call for Alina Design Co.'s new Chi-Town Chino Expansion Packs. Expansion Pack 2, full-length chino pants, immediately caught my eye. I hesitated in applying because my normally busy fall, with the start of the homeschool year and both my daughters' birthdays, is even busier this year. My little brother is getting married and not only am I sewing the kids' outfits, but I am baking the wedding cake.
I did not have time to test a pattern, especially not an involved pattern like these pants.

I really liked the look of the chinos, though, so I threw caution to the wind along with my name in the hat. I got to work immediately after we returned from our initial two weeks at the beach. I spent a solid week working on the pants, and not only am I really happy with the way they turned out, but I learned a ton. They are the first pair of adult pants I've ever made, but they definitely will not be the last.
I wear jeans nearly every day in fall and winter, but like many of us, I have a lot of trouble fitting into any other RTW pants. I always thought it was because I have thick legs, and that most pants "just didn't look good on me."

Sewing to the rescue yet again!
Testing these chinos turned out to be a great lesson in fitting. Alina and other more experienced pants-sewing testers were very helpful in trouble-shooting fitting issues. But perhaps even more helpful was being ablee to see other people's muslins and projects in the testing Facebook group and read diagnoses of fit issues I didn't encounter in my own pants. It was really like a crash course in pants fitting.
These pants are a tester version size 16 and a pretty good representation of the pattern. My muslin had a lot of excess fabric under my behind, so I had to slice a triangle off the back leg by cutting length off the back crotch curve and tapering to nothing down around the knee (funnily enough, this sort of adjustment is called a "thin thigh," something no one has ever accused me of having). While I was fiddling with my muslin, I ended up taking more than 2" off the crotch curve. Somehow, while this seemed to work ok in my made-of-muslin muslin, it did not work at all in the cotton twill I used for these pants. I couldn't sit without them sliding all the way down.
 To say I was bummed would be an understatement. I was really motivated to make the pants wearable, so I mulled over how to add length back to the crotch. I ended up putting in a crotch gusset to restore some of the back crotch length I had removed, and it worked. My final pants had a thin thigh adjustment of about 1 3/8", and it's still a little much. Once I redo it, I expect it to be pretty close to the thin thigh adjustment Alina made on the final pattern.
In addition to the above changes, my muslin showed me that I needed to take out 1" of height from the front crotch. I also widened the legs of the pants from the mid-calf downwards to make the pants hang on me more like the line drawing. Despite all my adjustments, there are a lot of diagonal ripples from the back of my knees to my inner thighs. The ripples become less pronounced after the fabric relaxes, but they are still a bit excessive. After doing some research I have postulated that I am slightly knock-kneed, and that I need to add more length to the inseam of my pants to fix those ripples.

I used this cotton twill from Joann's, bought with a 60%-off coupon. I used it two years ago for cargo pants for G, and those things held up to twice-weekly washing until he outgrew them. I expect to be putting them on Niko this winter and then we'll match!
The waist is finished with a waistband facing instead of a waistband, and closes either with a button or a hook-and-eye closure (I chose the latter). The pants have slash front pockets and back welt pockets with French seams and button closures. I really love the French-seam feature of the pockets, and have used it since on the welt pockets of the three pairs of Oliver+S Art Museum Trousers I made for the wedding.

The day after I finished these pants, I took the kids back to the beach with my dad for a few days. We needed a little more vacation. It was so humid that my camera lens fogged up every time I took it outside. The resulting photos I took at the beach are pretty bad, but looking at them makes me happy so I'm posting a couple anyway.
The welt pockets are finished with buttons, but you'll notice there are no pocket buttons on these pants. That is because when I lengthened the back rise on the pants, I did not think to adjust the pocket bags. As a result, the interfaced part of the pocket back, which is meant to support the button, doesn't line up with the buttonhole. I left them off and actually prefer my pants without pocket buttons, but if you want buttons on your pants and are also messing with the back pattern pieces, be sure to adjust the pockets correspondingly.


While on vacation last month, I saw the tester call for Alina Design Co.'s new Chi-Town Chino Expansion Packs. Expansion Pack 2, full-length chino pants, immediately caught my eye. I hesitated in applying because my normally busy fall, with the start of the homeschool year and both my daughters' birthdays, is even busier this year. My little brother is getting married and not only am I sewing the kids' outfits, but I am baking the wedding cake.
I did not have time to test a pattern, especially not an involved pattern like these pants.

I really liked the look of the chinos, though, so I threw caution to the wind along with my name in the hat. I got to work immediately after we returned from our initial two weeks at the beach. I spent a solid week working on the pants, and not only am I really happy with the way they turned out, but I learned a ton. They are the first pair of adult pants I've ever made, but they definitely will not be the last.
I wear jeans nearly every day in fall and winter, but like many of us, I have a lot of trouble fitting into any other RTW pants. I always thought it was because I have thick legs, and that most pants "just didn't look good on me."

Sewing to the rescue yet again!
Testing these chinos turned out to be a great lesson in fitting. Alina and other more experienced pants-sewing testers were very helpful in trouble-shooting fitting issues. But perhaps even more helpful was being ablee to see other people's muslins and projects in the testing Facebook group and read diagnoses of fit issues I didn't encounter in my own pants. It was really like a crash course in pants fitting.
These pants are a tester version size 16 and a pretty good representation of the pattern. My muslin had a lot of excess fabric under my behind, so I had to slice a triangle off the back leg by cutting length off the back crotch curve and tapering to nothing down around the knee (funnily enough, this sort of adjustment is called a "thin thigh," something no one has ever accused me of having). While I was fiddling with my muslin, I ended up taking more than 2" off the crotch curve. Somehow, while this seemed to work ok in my made-of-muslin muslin, it did not work at all in the cotton twill I used for these pants. I couldn't sit without them sliding all the way down.

In addition to the above changes, my muslin showed me that I needed to take out 1" of height from the front crotch. I also widened the legs of the pants from the mid-calf downwards to make the pants hang on me more like the line drawing. Despite all my adjustments, there are a lot of diagonal ripples from the back of my knees to my inner thighs. The ripples become less pronounced after the fabric relaxes, but they are still a bit excessive. After doing some research I have postulated that I am slightly knock-kneed, and that I need to add more length to the inseam of my pants to fix those ripples.

I used this cotton twill from Joann's, bought with a 60%-off coupon. I used it two years ago for cargo pants for G, and those things held up to twice-weekly washing until he outgrew them. I expect to be putting them on Niko this winter and then we'll match!
The waist is finished with a waistband facing instead of a waistband, and closes either with a button or a hook-and-eye closure (I chose the latter). The pants have slash front pockets and back welt pockets with French seams and button closures. I really love the French-seam feature of the pockets, and have used it since on the welt pockets of the three pairs of Oliver+S Art Museum Trousers I made for the wedding.

The day after I finished these pants, I took the kids back to the beach with my dad for a few days. We needed a little more vacation. It was so humid that my camera lens fogged up every time I took it outside. The resulting photos I took at the beach are pretty bad, but looking at them makes me happy so I'm posting a couple anyway.
The welt pockets are finished with buttons, but you'll notice there are no pocket buttons on these pants. That is because when I lengthened the back rise on the pants, I did not think to adjust the pocket bags. As a result, the interfaced part of the pocket back, which is meant to support the button, doesn't line up with the buttonhole. I left them off and actually prefer my pants without pocket buttons, but if you want buttons on your pants and are also messing with the back pattern pieces, be sure to adjust the pockets correspondingly.

It's been a few weeks since we returned from our impromptu half-week at the bach and summer is finally over. We wore sweatshirts and socks to the park today. I'm in mourning, but at least I have some nice new pants to cheer me up.
Subscribe to:
Posts (Atom)