A sewing blog about building a functional, cohesive handmade wardrobe, one garment at a time.
Showing posts with label top. Show all posts

Wednesday, November 20, 2019

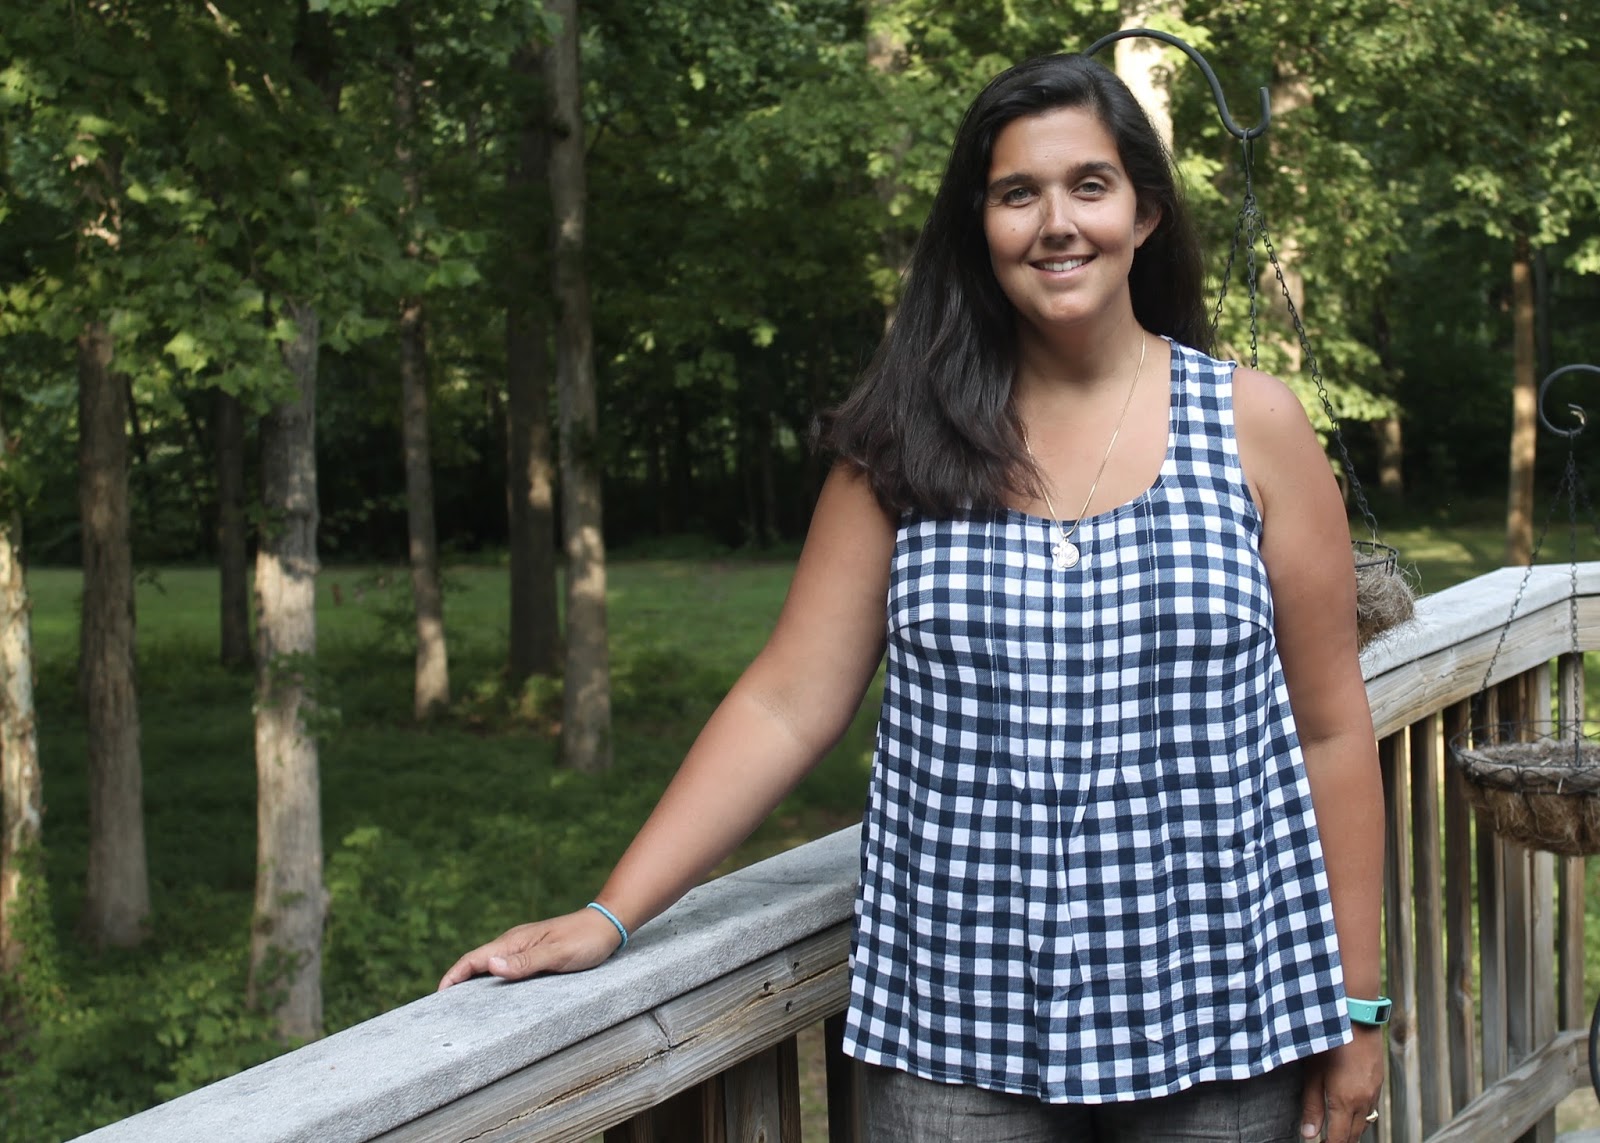
New Look 6582 sewing pattern review

Review of the New Look 6582 sewing pattern.

I'm so glad to have finally sewed this fabric, which I bought more than three years ago. I've always loved it but just didn't have a pattern for it. Then this summer I bought New Look 6582 and a match was made.

Wednesday, November 6, 2019

October 2019

October was nuts. We had a birthday, a trip to the Amazon and our 12th anniversary. I had been in a bit of sewing rut, but this month pulled me out of it.  I made a few things for myself and sewed a lot for my kids, which was one of my goals for this year.

Sunday, November 3, 2019

McCalls 7435 cowl-neck top

McCalls 7435 is a ridiculous pattern.  And clearly, everyone knew it but me, because it is out of print, and I've only found Internet evidence that three other people ever made it.  I'm sharing this review mostly just to talk about the sheer insanity that is this pattern, and also to talk about why I kind of love my finished garment and am going to be wearing it all the time.

Cozy cowl-neck sweater made from the McCalls 7435 sewing pattern.

Thursday, September 12, 2019

Plantains again

Today I've got a couple more Plantain tees to show you, which I think brings my total up to roughly 11,000 items sewn from this pattern.

I made both tees from the original (non-updated) pattern in a size 40 shoulder widened to a 42 under the armscye and size 42 sleeves.  I think, at a glance, these tees look like they fit perfectly well, and I certainly would agree, were I to happen on them in a store.  But as usual, here I am picking apart every wrinkle and pucker.  Every time I critique the fit of my garments, I get encouraging comments saying that I'm too hard on myself, etc.  And I totally appreciate and get that.   I do wear these tees a lot, so my fit critiques don't really hinder the amount of use I get from a garment.  I just find that I kind of enjoy analyzing fit issues. I guess it's almost like a secondary hobby to my sewing. Anyone else do this?


Monday, June 10, 2019

Summer sewing for the girls

One of my 2019 sewing goals was to sew more for my children.  I made some strides in doing that in May.  We had a trip planned to Cartagena on Colombia's Caribbean coast, where it's 90 degrees and 80+% humidity year-round. The girls' hot-weather wardrobes were looking a little bedraggled, so we pulled a few fabrics from the stash and I got to work.

I made each girl a romper using this free pattern from Purl Soho. I made one for N first.  I cut the size 6/7 width and the size 10 length, with the prescribed strap and elastic length. The sizing ended up pretty spot-on.  I used 28 inches of a plaid shirting that I ordered from Fabric Mart in April.  Looking at the photos, I think she could have used a touch more length in the bodice; this probably won't fit next summer.

Purl Soho Summer Romper in pink plaid shirting.

Thursday, February 21, 2019

Denim Gallery Tunic

Denim tunic made from the Liesl and Co. Gallery Tunic sewing pattern.


Before we packed up in Virginia, I paired three cuts of fabric with patterns and put them into clear zippered bags (the kind sheets come in) along with notions and thread. The idea was that they would be the first projects I would work on when I arrived in Colombia.

Tuesday, July 18, 2017

Gingham Josephine

Immediately after finishing my replacement Kaffe Fassett Josephine, I sewed up another one.  I had a yard of this rayon challis in my stash (what else does a girl like me - or you - do with an Amazon gift card, anyway?) and it was just enough to squeak out the pattern (this was helped by the fact that I had previously modified the back to have a center seam). piece.  I think I had to cut the front bodice piece slightly narrower at the hem to squeak the top out of a yard.


The modifications are the same as the floral version, but this time I sewed the release tucks a couple inches longer.  The rest of it is exactly the same.  And just like the last version, I used some cotton shirting to make bias tape to finish the armholes and neckline.


Rayon challis is a great fabric to use for this pattern.  It keeps all the volume of the fabric below the tucks in check, so you get a breezy top that doesn't look like a muumuu.  I am also an eternal fan of plaid in general and gingham in particular (as evidenced by several recent makes), so this has been getting a lot of wear in the past month.


My pattern matching on the back isn't perfect, but I'm digging the slight wonkiness.  And I'm so glad I took the time to get this pattern to where I wanted it.


Thanks for reading, and see you next time!
SaveSave

Tuesday, June 20, 2017

Replacement Josephine

The Josephine tank I made last year fell apart in the wash. Thankfully, I had just enough of this gorgeous Kaffe Fassett rayon challis fabric left to redo it.


I've sewn the pattern twice before, and each time I've had to make a number of adjustments to get it to fit my body.  Some of those adjustments were alterations done on the fly, and I still didn't have it quite right.  So this time, I reprinted my pattern and made another muslin.


Thanks to the second muslin, I think I finally cracked the magic combination of pattern alterations to get it to fit me the way I want.  Firstly, I realized that the shoulder is just too wide for me, even though I have been using my high bust measurement and doing an FBA.  So this time, as usual, I started with the size large C/D cup with an FBA (using a French dart that angles up from the waist rather than a horizontal dart).  I also narrowed the straps, mostly from the armscye, which I also lowered and scooped out a bit at the armpit to deal with excess fabric.


Wait, I'm not done yet.  I also did a forward shoulder adjustment, shortened the straps by 1/2" (so maybe I lowered the armscye too much), lowered the neckline and made a hi-lo split hem.  My muslin also had some back neckline gaping.  I am sure my original Josphines had this problem too, but I guess I have been so used to back neckline gaping that I didn't really notice it.  All my fitting practice has got me looking at my clothing more critically now.  To fix the gaping, I turned my single back piece into two pieces with a back seam.  I sliced an inch off the pattern piece at the top center back, tapering to nothing around my waistline, and now the back neckline sits beautifully.


On my last top, I had a bear of a time putting on the (rayon) bias binding.  Part of it was the fabric and part of it was my machine's tension going haywire halfway through the sewing.  I had to unpick and resew it a few times, and I guess the rayon just couldn't take any more, and ended up shredding in the wash.  So this time, I made my bias binding out of cotton shirting. But even having done that, I'm not sure I will let this one near the washing machine.  I had to clip the neckline more than every 1/4" to get it to lay flat.  Knowing how close I clipped to the seamline makes me nervous!


I recently had a look at Rae's original sleeveless version for this pattern and I realize that there isn't much of a resemblance anymore.  But really, most of the work I did was to the upper bodice.  The shape of the top through the waist down is the original draft, as are, of course, those gorgeous pleats.

The pleats (and also frugality and laziness when it comes to tracing/printing/cutting a new pattern) are the reason that I stuck with this pattern despite the fact that it just doesn't fit me at all, out of the envelope.  I probably could have modified a different pattern to add the pleats, but I didn't want to.  And all's well that ends well, except now I have a hankering to refit the sleeved pattern too, for fall, which will involve more armscye tinkering and a totally new sleeve.


For now, though, I'll enjoy my breezy new top.  Thanks for reading, and see you next time!
SaveSave

Tuesday, June 28, 2016

A couple of woven tees

I'm usually a knits girl, but this summer my wardrobe seems to be crying out for woven tees.  I couldn't find exactly what I wanted, so I knew I'd be altering whatever pattern I bought.  I picked up a copy of Simplicity 1377 (now out of print) on eBay and got to work.


I traced out view D and made a few flat pattern adjustments.  I started with size 14, which corresponds with my high bust measurement (my full bust and everything else put me at a 20).  This top doesn't have a bust dart, but it's easy to put one in - I did so while also performing a 1/2" FBA.  My F cup actually would justify a larger FBA, however, after consulting the finished measurements I figured 1/2" would be big enough.  While I was slashing my pattern, I lowered the neckline 3" and did a 1/2" forward shoulder adjustment. I also flared the side seams out starting from the rib cage and ending 1" wider than the pattern pieces on both the front and the back for a total of 4" increased at the hem.  Then I did a quick-and-dirty muslin, and based on that, I lengthened the top 1.75" and lowered the neckline another 2".


It sounds like a lot, but all the adusting, cutting and muslin sewing only took about 90 minutes.  And it was WELL worth the effort.  I didn't get a perfect fit on my first try, but I did get something very wearable.

Although the fit was good, I had a lot of trouble binding my neckline on my first fashion fabric version of this top.  I chose to finish the neckline with an invisible bias finish, which I've done a few times before.  I did everything I was supposed to - staystitched, understitched, clipped.  Even so, I had to rip out the binding three times due to awful gaping.  By the time I was done, I had clipped the seam allowance at 1/4" intervals all the way around the neckline.  I also cut some of the width off the binding and ended up finishing it at 1/4".  It still wasn't perfectly flat, but I just folded a pleat over into the neckline and called it good.  I'm going to blame the fabric here, because I did not have nearly the same problems with my second version.  An Instagram consult yielded suggestions to shorten the binding, which didn't occur to me in the moment but which I will keep in my back pocket the next time I make this top in a drapey fabric.

This particular fabric is a remnant bin find at Joann's that I haven't been able to locate on their web site.  I'm guessing it's polyester.  It is very light and drapey and nice to wear but really not so nice to sew - I wouldn't dare sew it into anything with more seams than this top! 


Let me just take a quick moment to talk about fit and exalt the humble FBA.  Look at the back of this blouse.  This is a size 14 - the upper back is out of the envelope as I didn't start flaring my side seams until my ribcage.  Simplicity says this fits a 36" bust and drafts for a B cup.  My full bust measurement is 41".  I have ample assets in the front but I'm not crazy unproportioned or anything like that.  And yet the upper back of the size 14 fits me perfectly.  High bust size selection FTW!  I would have been utterly disappointed if I had cut the size 20 the size chart indicated for me.  FBAs are always worth it.


Immediately after finishing the gray top, I cut out another, this time in a long-hoarded voile.  While sewing it, it dawned on me that perhaps the neckline was just too wide.  I made a 1/4" pleat before attaching my binding and then I adjusted the neckline correspondingly in my pattern piece for future makes.  I only had to sew my neck binding on once this time - as with the other top, I cut 1" binding to finish at 1/4" and I made sure to clip my seam allowance every 1/4".

Where I had just clipped the sleeve hem and folded it over and topstitched on the gray top, here I cut out more binding and bias-bound the sleeves too.  It wasn't painful in this stable cotton.  I do find the voile top a bit roomy in the shoulders - especially when I sit down.  I don't have this problem with the drapey poly - fabric choice makes all the difference.


I'm currently sewing a white cotton lawn version of this top - this time I've  incorporated a v-shaped neckline cut-out and am french-seaming the whole thing.  I'm waiting for a FabricMart order to arrive later this week and in it there is a cut of rayon challis that is destined to be my fourth version.  And so my summer uniform turns out to be brought to you by Simplicity - 1887 for the bottoms and 1377 for the tops.

Another note, these are my first pictures taken using the camera remote I recently received for my birthday.  I have to say I love this thing, though it does have an annoying 4-second lag between when I hit the button and when the shutter snaps.  But yay for no longer having to corral my kids and husband to take pictures.

Wednesday, June 8, 2016

Vienna Tank Test

Last week I tested the new Itch to Stitch pattern, the Vienna Tank (affiliate link).  This was my second Itch to Stitch pattern.  After having sewn the Lisbon Cardigan (which I've now made three times - the last two will be blogged soon), I was excited to try another pattern from this line.  The Vienna looked like the type of top I would gravitate towards in a store, so I was happy to be chosen to test it.


The tank features a woven yoke with a knit bodice which is gathered to the front shoulders and center back.  The front neckline ends in a slit and is closed with a (woven) bias tape tie that also finishes the neckline.  View A includes a cute neck ruffle too. 

Since I was testing, I cut the pattern according to my measurements - a size 12, graded to a 14 at the hip and lengthened about 3/4".  My knit is very drapey, making the top longer.  The length is fine, but if I were to make it in a less drapey fabric I think I'd lengthen by 2".

Cutting my size out of the envelope is not how I usually approach knit tops.  I usually cut according to my high bust (which is 5" smaller than my full bust) and then grade out to my full bust size at the bottom of the armscye.  Sometimes I do a knit FBA (dartless) using this method.  Cutting my usual size didn't work out for me in this instance either - it gaped around the fronts of the armholes until I took it in an inch on each side starting at the bottom of the armscye and tapering to nothing at my ribcage.  The photo above was taken after the alteration and the two photos below are before the alteration.  


I find it a bit too big in the shoulders at the front.  I also need to do a forward shoulder adjustment.  I am not sure whether my usual mods will work in this gathered style, but I might try making another one, cutting a 10 shoulder and doing an FBA. 

The pattern is very nicely drafted - everything matches up the way that it should, and the instructions are clear and thorough.  Almost everything has a clean finish. The only exception is the knit portion of the armholes, which are turned under and stitched.  Since knit doesn't fray, this isn't a big deal, but it is an outlier on what is otherwise a totally neat finish on the inside.


The construction techniques are not difficult, however, the center seam facing on the front needs to be topstitched, and this is not an easy feat on knit fabric (especially in a drapey knit like the rayon jersey I used).  I found Wonder Tape to be indispensible for this step.  This is not the sort of knit top you can construct on your serger - many of the seams need to be sewn with a sewing machine.  

After I applied the Wonder Tape, I had no problems topstitching the front.  The little pulls you see in the previous photo evened out in the wash.


I'm still not sure this is the most flattering top on me, however, it looks universally fantastic on the testers with smaller busts.  I especially like the versions made in a woven fabric with the neck ruffle - the pattern isn't drafted for wovens, but it works nicely for people with smaller busts than mine - up to a C, it seems.  For me, I think maybe I need a little less ease in the lower bust area to get some definition there - as it is, it just kind of waterfalls off the top, making my bust look smaller and the rest of me look bigger.


This top is made of a vaguely splotchy rayon jersey and a rayon twill woven upcycled from an old dress.

I do have a fabric combination picked out for another one, but I need to make a few more bottoms for myself before my current selfish sewing spree comes to an end!


Saturday, May 7, 2016

Me-Made May 2016 Week 1

This is my first year participating in Me-Made May.  I wasn't going to join because most of my me-mades from my selfish sewing spree of 2013-2014 are still too small, and I didn't think I had enough.  But at the last minute, I changed my mind, and I'm glad I did.  First of all, I have a few more things than I thought I did.  And secondly, it has motivated me to sit down and sew for myself despite not being happy with my weight.  This week I've sewn myself two new t-shirts and a cardigan, and have been motivated to start getting some photos snapped of the skirts I made myself in April so that I can blog them (see my last post for a couple of them).

I skipped May 1 because it was Pascha.  But after that, I took photos every day.  As it rained all.week.long, I didn't even try to do better than iPhone photos.

May 2: A Sewaholic Renfrew and thrifted skinny jeans.


May 3: A to-be-blogged tee made using a mash-up of the Renfrew and Plantain t-shirt patterns and heavily altered linen pants from Old Navy.


May 4: A Plantain tee and a denim quarter-circle skirt made using the By Hand London Circle Skirt calculator.  The skirt is one of the garments I had forgotten about.  I didn't like it much when I first made it, but it started to grow on me when I wore it on Wednesday.  I guess that one of the purposes of this whole exercise, anyway.


May 5: New Look 6937, or something like that, which is the first garment I ever sewed for myself using a commercial pattern.  The experience was so horrible that it was very nearly the last garment I ever sewed for myself.  This pattern has some particularly bad drafting and the instructions were not sufficient for my then-beginner self.  The back is really wonky - I had to do some creative tucking and darting to get it to fit properly.  It's kind of hard to believe that I sewed this only four years ago.  I feel like I've come so far since then! 


May 6: A self-drafted rayon tee based on a RTW shirt I own.  I really need to make another of these, not lease because this one was hit with a nasty grease splatter while I was cooking dinner that night, and it did not come out.   I really need to make a habit of wearing an apron while cooking.  Does anyone do that anymore?


May 7: My brand-spanking-new Itch To Stitch Lisbon cardigan, which I sewed this week after seeing the pattern come out.  I will be blogging this one soon.  Underneath it I am wearing a Maria Denmark Kirsten Kimono tee.


I'm calling this week a success.  I had only set myself the challenge to wear me-mades four times a week, and yet I managed to do so every day.  When the weather warms up (come on!) I should be able to manage total me-made-ness because I have a number of handmade skirts.  It is clear, though, that if I really want to become clothing self-sufficient, I will have to overcome my fear of making my own jeans.  Because when it is cool out, that is all I wear.  Maybe this fall ...

Tuesday, November 10, 2015

Renfrew x 2

It's fall and I am missing my plaid French terry Renfrew!  It is in my closet, but way too small.  So I decided to make a replacement.


After consulting the finished measurements, I decided to make a straight size 16, knowing full well that the shoulders would be a bit big.  It was late and I did not feel like futzing with flat pattern adjustments.  I think it actually turned out pretty well - the oversized look of the slightly wide shoulders is casual and sweat-shirt-y.  It is very cozy for a cold fall day.


The fabric is a nice thick houndstooth-print jersey at the thrift store a few months back.  I am not sure what the content is - it has great recovery, so there is definitely a good amount of lycra in there.  I think it is probably a cotton/poly blend.  The cowl is Laguna jersey.  

We took a bunch of outside photos, but the top one is the only one that did not make me look ridiculously top-heavy.  I have to figure out where to stand in relation to my husband (or daughter) to get the best angle.  The mirror shots are much better.


After that Renfrew, I decided to make a scoop neck.  This time I used a 12 shoulder, widening to a 16 at the bottom of the armscye.  I ended up taking in quite a bit at the seams from the waist all the way up through the arms.  I used a cotton/lycra knit with good (or so I thought) recovery, but it still fit much wider than the cowl version.


I also noticed while sewing this one, that there was definitely a problem with excess fabric at the sides of my chest.  I did not notice it as much with the cowl version, but it's really noticeable in the top photo in this blog post.    After some Googling, I found that I was not the only one with this problem.  The armscye is too high.  I'd like to scoop it out, but then I will have to alter the sleeve too. Instead I think I will just try a Plantain for my next knit top.


After making the top, it occurred to me that perhaps the print was a bit too loud (I had actually bought it with a summer skirt in mind), but I wore it last Sunday and got a bunch of compliments!  I was really surprised.  It's funny how a compliment can make you think about an item of clothing differently.  


My six-year-old took the outside photos.  I didn't realize she had me lined up right in front of the very attractive composter.  After she was done, she requested that I photograph her.

Sunday, October 11, 2015

Maternity tee tutorial: 3 ways to sew it

Easy maternity tee tutorial

I first wrote those post more than five years ago while in the home stretch of my last pregnancy. It's been pretty popular, so I wanted to update it to be a little easier to understand. (To be clear, I am not currently pregnant!)

Monday, July 20, 2015

Spotty Sailboats

Papa came home from the hospital last Tuesday and everyone is very excited to have him home.  It is an adjustment for everyone - while in the hospital, he became accustomed to relative quiet and order, two things that are in short supply around these parts.  And we are having to learn a new way of interacting with him.  Thankfully, Gabriel's running-start-around-the-knees hugs haven't knocked him over. 

We have a long road ahead of us yet.  Next week, hopefully, he will start outpatient therapy.  We are incredibly lucky to have the gift of time for him to recover.  Thanks to the generosity of his friends and colleagues at work, we have received enough donated leave that we will not have to worry about rushing him back to work before he is ready.  Everyone has been very kind.

******************

I love the O+S Sailboat pattern.  It was the first O+S pattern I ever bought.  I have sewed the pants three times now, the top three times (once as a dress) and the skirt once.


Zoia requested these pants several months ago.  The fabric is a remnant-bin quilting cotton from Joann's.  it is a lighter weight than most quilting cottons, and I think it cost about $1.24, so I grabbed it.  The dots are navy on a turquoise background.


I sewed the pants, she tried them on, then put them in her drawer and completely refused to wear them.   Then one night last week she suddenly declared that she would wear the polka dot pants the next day.  I took advantage of her acquiescence and had her pose for some photos (good thing, too, as she has not worn them since).


One of the problems I found with these pants when I made them for my girls as babies is that they don't have much cloth diaper room.  And even without diapers, the rise is a little low in the back for my be-junked 4.5-year-old.


It was a good wardrobe day all around when I managed to talk her into pairing them with one of my favorite makes ever - a sweet little linen dress sewn about two years ago from a Japanese pattern book.  (Pattern #30 from Japanese book Boys and Girls Clothes #1848, in the 100 cm size).

Here it is right after completion.  She was 2 years and 8 months old.


Oh my.  Where did that time go?

She loved the dress when I made it.  She wore it all the time.  Last summer it mostly just sat in the drawer, and now I have to cajole her into putting it on.  I will be so sad when she completely outgrows it.


Sunday, March 23, 2014

Slinky and the Grain

Back in January, I ordered a few patterns for me (New Look 6808, New Look 6781 and Simplicity 2447).  Around that time the U.S. was pummeled by some enormous snowstorms, which completely screwed up the mail for those of us who have APO/FPO/DPO addresses overseas.

My patterns  f i n a l l y arrived last week after a torturous wait on this side of the world.  I didn't waste time and immediately traced out View E of New Look 6808.  I drafted a size 14+FBA for my 39-31-41 self, and I rotated the bust dart down into a French dart, which I find a little more flattering on me than your standard horizontal dart.

Then I set about tossing through my stash for a suitable fabric.  I've been paying a lot of attention to fabric choice lately, and I knew I wouldn't be happy with this top in a crisp cotton.  I wanted something with a luscious drape, to skim over those wobbly bits and make me feel slinky.

Slinkiness is elusive when your kids use you as a human tissue, trust me.  But on those rare occasions when I can rock the slink, I enjoy it.  Don't you like feeling slinky?


(Although my tummy is far from flat, what you see there is the crazy wind whipping the fabric around, and not my belly.)

After some digging, I found a piece of black something-or-other that I bought eight years ago in Armenia, when I used to have clothes made for myself by a local seamstress.  I think I bought it intending to have a skirt made, but I never did and somehow it got packed and unpacked and carted around in our household effects for another four years until I began sewing.  I don't even know what this fabric is - it's definitely synthetic, matte like chiffon but a bit heavier, and has a slight crosswise stretch.


(See?  No protruding tummy).

This pattern is meant to have vertical front darts.  I sewed them in when I muslined the top (yes, I muslined, using an old sheet!) but it made the top too tight.  I didn't think too hard about why it was tight, and just forged ahead.  I thought that maybe the stretch in my fashion fabric would help out, and figured I could always sew the sides up with smaller seam allowances.


Well, the stretch didn't help me.  It might have, had I actually cut both the body pieces on the grain like I was supposed to - but somehow I accidentally cut the back on the crosswise grain, so the stretch on that piece runs bottom to top instead of side to side.  Facepalm.  I didn't have any fabric left to cut a new back, so I just went with it.


I sewed smaller seam allowances (3/8" instead of 5/8") but in the end I just left the front vertical darts off.  The back darts do provide some shape, so it's not a total potato sack.  I later realized what the problem was.  While my front FBA added width necessary to fit my waist and high hip, I had neglected to add the necessary width to the waist and hip of the back piece - I had just cut a straight 14, and I should have graded out to an 18 after the bust dart.  So my side seam is not actually in the center of my side, and there was no fabric to spare for the front vertical darts. 


I actually kind of like it without the front darts, though.  In my post-childbirth, gym-less life, my stomach tends to really show how much I ate that day; sometimes it feels like, if I eat a banana, you can see the banana shape through my shirt.  So a top that skims over the lumps helps me feel put-together.  Fabric choice was key in this, though.  Most of my non-knit apparel stash consists of woven cottons, none of which would have been as fluid and skimming.

When I finished the top, I felt like it was missing something.  So I added the lace trim to the bottom.


I am pretty happy with it top, though the collar turns out to be just slightly too wide for my taste.  It's a bit sailor-girl, which is cute but interferes with the slinky.  The collar on view D is a bit narrower.  I think I will use that collar for my next iteration.  I also plan to redraft my back pattern piece to be a little wider below the bust so that I can try out those front vertical darts.


The wind on this particular day was killer.  Chicago ain't got nothing on Tbilisi.  There were a few times I was afraid the gusts would blow me off the cliff.

Cousin It, signing off.