
Showing posts with label cardigan. Show all posts
Showing posts with label cardigan. Show all posts
Sunday, September 22, 2019
Green Blackwood
Three years ago, I made a bright green Lisbon cardigan. It was, hands down, my favorite item of clothing. I wore that cardigan constantly for two years, until a giant purple splotch, about the size of a half-dollar, appeared on the back. I have no idea what caused the stain or where it came from, but no amount of stain-treating would get it out. It was a sad day when I realized this, so I'm just going to take a moment to reminisce about my favorite me-made ever ...


Monday, July 1, 2019
June 2019

This month was a little bit insane. Fueled both by the need for clothes that fit AND the knowledge that I was going to be away from my machines for all of July and August, I sewed 15 16 17 garments (19 20 21 if you count both pieces of the four two-piece sets that I made). I completed another item off my Make Nine list- the Liana Jeans - twice.
Monday, June 25, 2018
Cropped Blackwood Jacket

This is one of those instances where the garment told me what it wanted to be as I was going along.
Thursday, March 1, 2018
February 2018
February was a busy month, and though I sewed quite a few individual garments, most of them were underwear and other things that don't take much time to assemble. I still have to blog a couple of these projects, and others will only be recorded here.
PROJECTS COMPLETED:

1) Simplicity 1563A pj pants. These used up 3 yards of flannel bought from FabricMart in January for this precise purpose. Completed 2/2. These will be on the blog soon.
PROJECTS COMPLETED:

Wednesday, February 28, 2018
Joining the M6996 party

This cardigan has been on my to-sew list forever. It gets great reviews, and all the ones I had seen in the blogosphere looked fabulous. The pattern is McCalls 6996, which I picked up during a $1 sale last summer but just got around to sewing up.
Wednesday, January 24, 2018
Cable Blackwood

Since making my long wool Blackwood cardigan, I've been on the hunt for another sweater knit fabric. I was having trouble committing to one online because I couldn't feel the fabric through my computer screen. But when I was at Joann's last month, looking for grosgrain ribbons for my girls' Nutcracker performances, I found this pretty cream-colored faux-cable knit. It is a polyester/lycra knit, something I generally stay away from, but it felt very nice in the store aaaaand I had a coupon, so I bought 2.25 yards. I haven't been able to find it online, but as it turns out, I can't really recommend the fabric anyway.
Wednesday, November 22, 2017
Long Blackwood
My husband and I went to New York City last month, alone, to celebrate our anniversary. One of the highlights was, of course, a trip to Mood Fabrics. I went in with a list, which helped keep my shopping focused. But even sticking to two sections of the store (wool knits and cotton shirtings), we managed to spend two hours there, and I was quite overwhelmed.

One item on my list was a sweater knit in a neutral color to make a long Blackwood cardigan. I found an olive green that was almost exactly what I was looking for, but my husband talked me into buying this wool jersey instead. He says I wear too much gray and black and apparently the green I had chosen was too close to those shades.


The fabric is a very cozy, nice quality knit. I can't figure out what color it is; in the store it looked like a magenta-ish purple, but since bringing it home I feel like it might be more of a dusty wine. Doesn't really matter; it plays the neutral role well, and I've yet to find an item in my closet with which it doesn't pair nicely.
I've previously made two Blackwoods (one unblogged, but you can see a photo on this Me-Made May roundup), but both were the shorter view A with no pockets. This time I did view B with the pockets. I attached the pockets to the cardigan using Wash-A-Way Wonder Tape instead of pinning, which has the added bonus of stabilizing the fabric to avoid wavy seams.

Like the last two time I sewed this, I sewed a medium at the top. Where last time I graded to an XL at the bust and used the XL sleeve, this time I graded out about 1/2" beyond the XL (so maybe an XXL, I'm not sure) at the bottom of the armscye and kept that width all the way down. I used the size L front band to compensate for the shortened distance between bust and shoulder, and it fit my modified pattern perfectly. I also widened the sleeves 1/2" on each side , tapering to nothing roughly at the elbow (where there was already a good amount of room), because I wanted to be able to layer the cardigan over a long-sleeved shirt. This provides enough room for my knit tees, but is still a little tight over my woven button-down shirts.

Oh, I also sewed the sleeves the length dictated by the pattern. Last time I thought they were too long, so I shortened them. For this warmer version, I wanted cozier sleeves. As drafted, the sleeves dip about 1.5" into my palm, and I think that's the perfect length. The only think I think I'd change for next time is to make the pockets about 1" wider. I can easily fit my phone and keys in them, but I think they would be cozier for hands if they were a little bigger, plus I think it would look cool.

As always, thanks for reading, and see you next time!


And there will definitely be a next time. Even with the pocket stabilization, this pattern doesn't take long to cut out and, once cut, sews up very quickly. And I clearly need another long version, as I've been wearing it several times a week since I made it.

As always, thanks for reading, and see you next time!
Friday, May 5, 2017
Geneva Cardigan
I did some pattern testing last week, and Z scored a lovely new cardigan out of it.

This is the Geneva Cardigan by Coffee and Thread, and I am a bit in love with it. It is a kids' button-down cardigan with four collar options and two sleeve options. I am a sucker for a Peter Pan collar, so there was no questioning which view I was going to test. N has in the past expressed a dislike for collars of any sort, so deciding who to make it for was easy as well.

I made 6-year-old Z the size 6. Although her chest measurement puts her at a size 3, she needed the width of the 6 for her broad shoulders. The rest of the cardigan fit pretty much spot-on (note that this was sewn up using an early version of the pattern; the designer added more room around the tummy during testing, which makes sense since Z measures three sizes smaller and this one fits her perfectly).

The pattern calls for stable knits, so I used a yard of navy blue cotton interlock from my stash and it was a great choice. I actually think this would work great, sized up, in fleece as a light jacket and I plan to sew one up this fall.
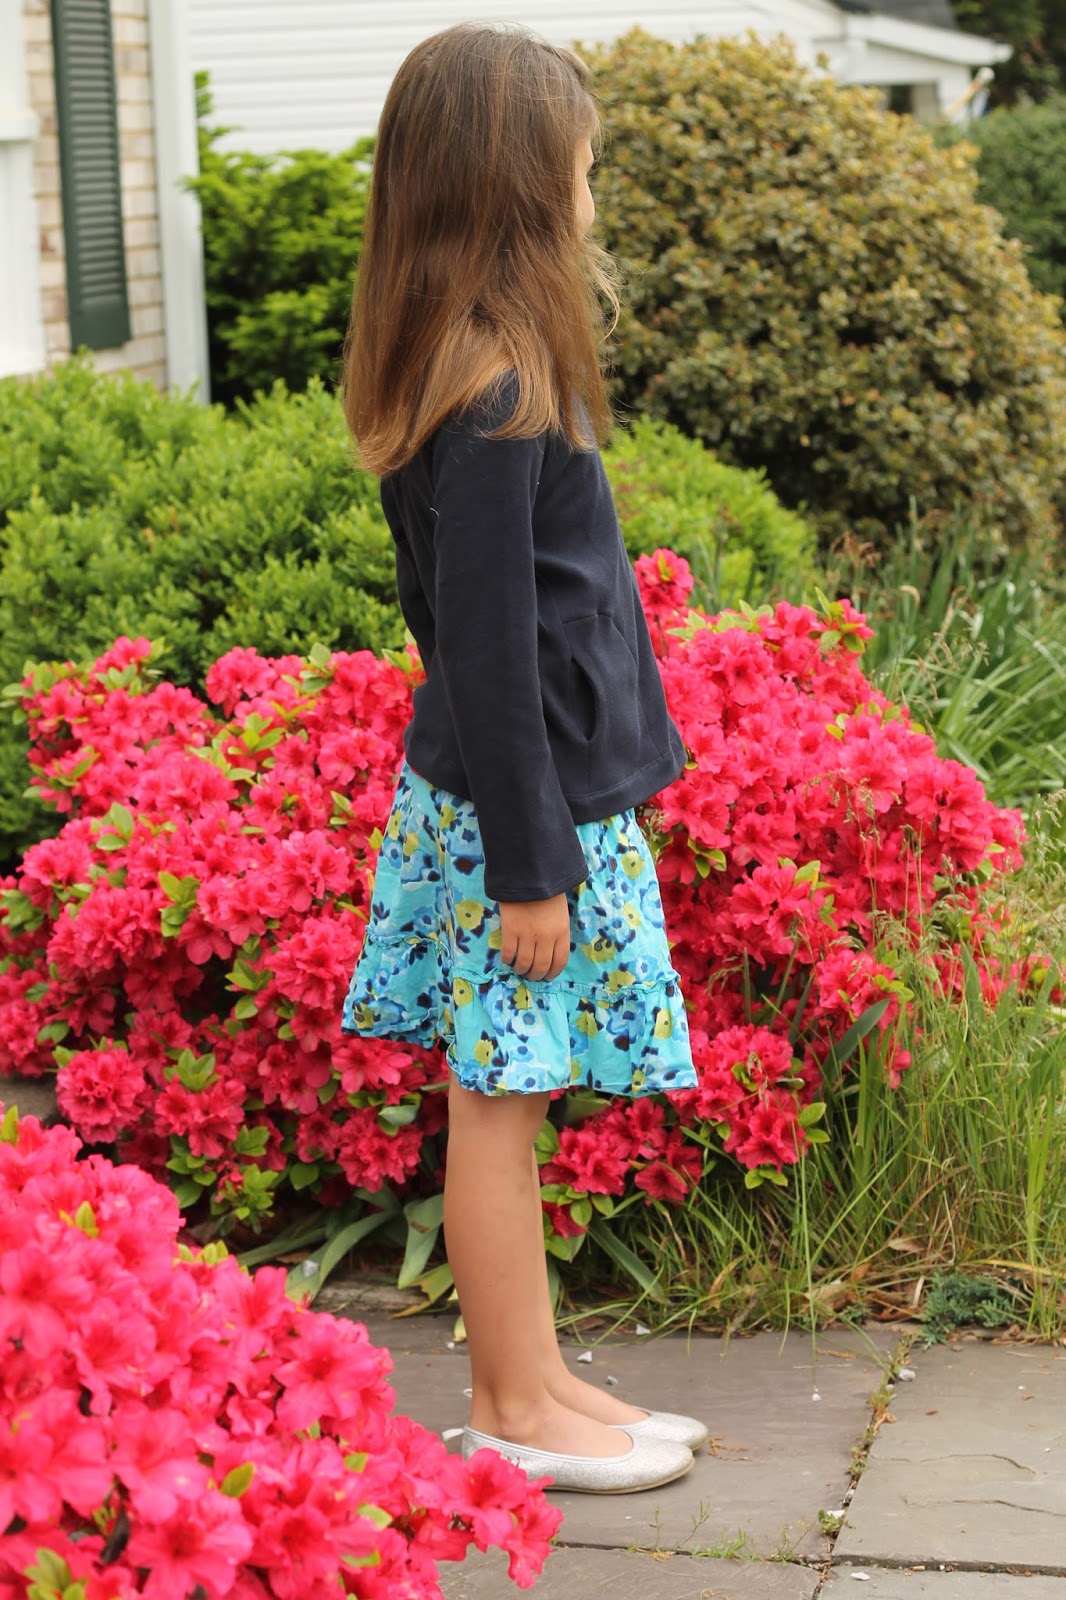
The pattern drafting is excellent, and the instructions are thorough. The collar is covered with bias binding, creating a nice clean finish. One of the testers also bound the inside seams, which was gorgeous.

The cardigan features sweet little pockets which are topstitched to the fronts. The pocket lining peeks out from the opening, so you could add a little contrast by using a different fabric there if you wish.

I used these little navy-and-white buttons from the thrift store. They don't read well from a distance but they are adorable close up.


I just took these photos last week, but already the azaleas have shriveled up and look kind of sad. Though I'm ok with it, if it means the pollen count is finally going down. I don't usually struggle with seasonal allergies, but this year even I am rubbing my itchy eyes and coughing and sneezing.

See you next time, and thanks for reading.
Tuesday, March 7, 2017
Striped Blackwood
I've mentioned that I don't normally buy patterns the second they come out. Turns out that I make an exception for cardigans, as this is the second one (the first being the Lisbon) that I have bought the week of its release. I knew immediately upon seeing the Blackwood Cardigan that it would get a workout in my wardrobe, so it jumped up to the top of my queue, along with a recently-purchased rayon/cotton/lycra striped pre-cut from Fabric Mart.

I chose the shorter view without pockets. I have a 36" high bust and a 42" full bust, so I sewed a medium at the shoulders, extending out to between the L and XL at the bottom of the armscye. I graded to an XL at the waist and kept the XL the rest of the way down. I didn't really know how long to cut the front band given my mods, so I just cut the XL and then tried it on my fabric at the end. I wanted to match stripes, so I just kind of fudged it.

The neckband seems to sit a bit higher on my neck than on the testers, so I think I probably stretched it too much around the back of the neckline. Also, I accidentally cut the neckband on the fold, so it's all one piece.

I cut the sleeve and bottom bands a tiny bit longer than called for since I wanted to continue the stripe pattern from the body of the cardigan. Sleeve length doesn't tend to be an issue for me one way or the other, but on this patternI found the sleeves very long - I cut 1.5" off the sleeve before attaching the cuff, and they are the perfect length.

The armscye is super high on me - it actually hits above the fold of my armpit. Surprisingly, it's not particularly uncomfortable, however, I will lower it for next time. I've already ordered some rayon/lycra knit in taupe for my next version.

As casual as this pattern seemed to me, something about pairing it with this striped knit almost feels blazer-esque to me. I think I could easily wear this with a black skirt and heels and look professional on the couple of days a month that I work out of the house.

I'm very happy with the fit. I might grade all the way out to the XL under the armscye next time, but that is the only modification I am planning. You can expect to see more of these from me!

I chose the shorter view without pockets. I have a 36" high bust and a 42" full bust, so I sewed a medium at the shoulders, extending out to between the L and XL at the bottom of the armscye. I graded to an XL at the waist and kept the XL the rest of the way down. I didn't really know how long to cut the front band given my mods, so I just cut the XL and then tried it on my fabric at the end. I wanted to match stripes, so I just kind of fudged it.

The neckband seems to sit a bit higher on my neck than on the testers, so I think I probably stretched it too much around the back of the neckline. Also, I accidentally cut the neckband on the fold, so it's all one piece.

I cut the sleeve and bottom bands a tiny bit longer than called for since I wanted to continue the stripe pattern from the body of the cardigan. Sleeve length doesn't tend to be an issue for me one way or the other, but on this patternI found the sleeves very long - I cut 1.5" off the sleeve before attaching the cuff, and they are the perfect length.

The armscye is super high on me - it actually hits above the fold of my armpit. Surprisingly, it's not particularly uncomfortable, however, I will lower it for next time. I've already ordered some rayon/lycra knit in taupe for my next version.

As casual as this pattern seemed to me, something about pairing it with this striped knit almost feels blazer-esque to me. I think I could easily wear this with a black skirt and heels and look professional on the couple of days a month that I work out of the house.

Wednesday, December 21, 2016
A bit of sparkle in the gloom
I had originally planned to sew myself a dress to wear to my brother's wedding. I even bought the Appleton dress pattern and some fabric to sew it up. As time drew near, however, I made the uncharacteristic decision to save myself stress and not try to do all the things, and went shopping instead.

I got really lucky and found a beautifully fitting princess seamed lace fit-and-flare dress at, of all places, Dress Barn. I find the name of the store really off-putting, but I had received a coupon in the mail and there's one near my house, so off I went. Dress sorted, the only thing remaining was to decide what to wear over it. I had a number of appropriate shawls, but one day I found myself with a couple free hours, so I sewed up my fifth Lisbon cardigan (affiliate link) in a metallic knit from the stash.

I sewed the cropped variation with a few mods. For this one, I went down to a 10 shoulder and graded to a 12 bust. I sewed a thinner bottom band and left off the buttons. When it was done, I found that the sparkle wasn't reading as much as I thought it would be, so I spent a few evenings embroidering beads on it.

It was a very satisfying project. I was so busy during the wedding that I didn't have time to do any proper blog modeling, but here are the two photos I could find.

I know I've already posted about how much fun the wedding was, but it's good for morale to keep reminding myself of it. Because two days later, my husband had open-heart surgery for a problem that we thought wouldn't need addressing until his 50s. Then not two weeks later, we found ourselves back in the ER and were admitted for another surgery to fix complications arising from the first. We spent a lot of time in the hospital in November, and the few weeks since at multiple doctors' appointments each week. He is at home recovering now, but I have to say I wouldn't be sorry to never enter a hospital again.

Friday, December 16, 2016
And now for the girls
As promised, here's part 2 of the wedding sewing. I sewed Oliver+S Fairy Tale Dresses for the three flower girls. I was originally going to use a posh cotton/poly satin from Mood Fabrics, but in the end I decided to save some money and bought this stretch cotton sateen from Joann's instead. I've used this fabric a few times before and I really like it. It has such a satisfying heft, a lovely sheen, and an almost spongy hand. It's a pleasure to sew and it works so nicely for a special occasion dress with a nice deep hand-stitched hem.

I bought the Fairy Tale pattern ages ago, and when I sat down to cut my pattern pieces, I was dismayed to see that I only had the smaller size range. In the end, the size 4 ended up working just fine. I actually ended up taking Natasha's dress in significantly, nearly to the width of a 2 (I was overzealous and it ended up a smidge tight on her), but the 4 worked fine for the other two, who are both size 6 in RTW. I added something like six inches of length to the skirt but I kept the bodice length as is. I like a slightly higher waist in little girls' dresses.
The dresses are fully lined in white cotton voile per the pattern instructions.

The only adjustment I made to the pattern was to the sash. The bride wanted it to wrap all the way around the waist. So I sewed up the dresses and made the sashes separately.
The fabric is a synthetic satin from Mood, which was the only place I could find the right shade to match the bridesmaids' dresses (Sangria from David's Bridal). The sashes are all the same width as the pattern's ties, though for some reason it looks like Natasha's folded over while she was wearing it, making it seem thinner. I rushed the sashes at the side seams of the dress. Our sewing fairy godmother made the thread sash carriers for me and posted them to save me some time.

As the dresses were sleeveless, the girls needed something to wear over them while outside. I intended to just buy RTW cardigans but couldn't find anything I liked. Then I remembered that I had a large cut of white cotton/lycra knit in my stash, and I ended up sewing three shrugs from stash fabric using this pattern that I've made before. The pattern only goes up to a size 4, but I figured it would be ok. I did lengthen two of the shrugs about an inch after I'd sewed the first one. They worked perfectly (in the below photo, my niece on the right is wearing the unlengthened shrug, and N on the left, with the weirdly thinner-looking sash, is in the lengthened version).

We all had a fantastic time at the wedding. My brother is the baby of the family and his wife came into his life literally a few weeks before our mother passed away. There were definitely tears thinking about her absence, but it was also a wonderful family time for all of us.

The kids, predictably, were the hits of the dance floor.

After awhile the shoes came off.

Then the tights followed suit. "Too sweaty," apparently, when you're bustin' a move.


Thursday, September 1, 2016
Purple Kool-Aid cardigan
I finally got around to sewing another Lisbon Cardigan (affiliate link). This is #4 and I am planning a few more. What can I say, I'm just a cardigan kind of girl.
Like my last three, this one is a size 12 graded to a 14 at the hips. I was tempted to cut a size 10 shoulder on this one, but I had not yet used a cotton/lycra for the pattern and suspected it might sew up a little smaller than the drapey rayon French terry and bamboo jersey I had used on previous versions.

So I stuck with the pattern pieces I had already drafted. I had lowered the neckline on two of my previous Lisbons but I decided to leave it as is for this one. It did sew up smaller, but the shoulder is still too wide. Also, because the fabric is less drapey than the fabrics I used before, the cardigan is shorter than the others and feels a little boxier.
It might seem kind of surprising that it would take me four iterations of the same pattern to figure out what alterations I'd like make, but different knits really sew up so differently. No two of the four cardigans I made fit the same.
 And now I know that, for next time, I am definitely going to cut a smaller shoulder. I have to go back and look at the pattern to see how much narrower the shoulder is on the 10; I might go down to an 8. I'm unsure as to whether I'm going to do an actual FBA or just grade out at the bottom of the armscye. I also want to experiment with the sleeve - I think I'd like to do a long hemmed sleeve instead of a cuffed sleeve. I won't want to lose any width in the upper sleeve, but I have a good bit of ease beneath the elbow, so I'll need to narrow that part.
Like on my French terry version, the front hems dip when the cardigan is worn open. I wonder if that is just what is going to happen with a cardigan, or whether it indicates a fitting issue, because it's not noticeable when the cardigan is buttoned.

And speaking of buttons ... I recently picked up another bag of buttons from the thrift store, and it happened to contain about two dozen 1/2" purple buttons that match the fabric perfectly. You may have noticed that they are not on the cardigan.
That is because I could not get my machine to sew buttonholes on this fabric for love nor money. Whomp whomp. Although my machine generally stinks at sewing knits, a layer of interfacing on the fabric has always been enough to get it to make buttonholes. I was out of knit interfacing when I sewed this, so I used two strips of knit stay tape instead. My machine didn't like that, nor was it cowed when I attached some tear-away stabilizer to the underside of the placket. So I bought some Dritz snaps, grabbed my hammer and got to work.

Yeah, so that wasn't so easy. I've never used metal snaps before, and it was a pain. I had a pack of 12 snaps and had to use them all to get 7 useable snap sets on my cardigan. I kept hammering the male sockets to the side, thus rendering them useless. I have a Kam snap press from my diaper-making days and am considering buying the dies I need to install metal snaps. Or maybe I'll just get a Snap Setter - I've heard good things. I don't mind the look of the snaps on the cardigan, but as I don't trust my snap installation, I'm very, very careful when I undo them


Like my last three, this one is a size 12 graded to a 14 at the hips. I was tempted to cut a size 10 shoulder on this one, but I had not yet used a cotton/lycra for the pattern and suspected it might sew up a little smaller than the drapey rayon French terry and bamboo jersey I had used on previous versions.

It might seem kind of surprising that it would take me four iterations of the same pattern to figure out what alterations I'd like make, but different knits really sew up so differently. No two of the four cardigans I made fit the same.

Like on my French terry version, the front hems dip when the cardigan is worn open. I wonder if that is just what is going to happen with a cardigan, or whether it indicates a fitting issue, because it's not noticeable when the cardigan is buttoned.

And speaking of buttons ... I recently picked up another bag of buttons from the thrift store, and it happened to contain about two dozen 1/2" purple buttons that match the fabric perfectly. You may have noticed that they are not on the cardigan.

Yeah, so that wasn't so easy. I've never used metal snaps before, and it was a pain. I had a pack of 12 snaps and had to use them all to get 7 useable snap sets on my cardigan. I kept hammering the male sockets to the side, thus rendering them useless. I have a Kam snap press from my diaper-making days and am considering buying the dies I need to install metal snaps. Or maybe I'll just get a Snap Setter - I've heard good things. I don't mind the look of the snaps on the cardigan, but as I don't trust my snap installation, I'm very, very careful when I undo them

The fabric is Robert Kaufman Laguna cotton/lycra jersey knit in Amethyst.
I've used Laguna a few times in the past and have found it to hold up
pretty well. But I'm not the biggest fan of the available colors. This
purple seems a little juvenile to me - not much depth and it reminds me
of the color of artificially "grape"-flavored things. But one can
never have enough cardigans (at least, not if one is me), so this has
already gotten plenty of wear and will continue to do so.

Even if it does remind me of purple Kool-Aid.
Monday, June 13, 2016
Two more cardigans
Well, it seems my selfish-sewing-jo is really on fire. The sewing streak I began in May has not let up, and now that I have a greater variety of clothing that fits, getting dressed is actually starting to become fun again. Recently, I've made two more Lisbon Cardigans (affiliate link).

For the first one, I used a 1.5-yard cut of a J. Crew polyester jacquard stripe knit acquired last year from Fabric Mart. I had bought it to make a slouchy t-shirt, but the lace stripes were a lot more see-through in person than I thought they would be. So the fabric went back into the stash to await its destiny. When I came across it in late May, inspiration struck. Sheer fabric isn't a problem if you're always going to wear it over something. So a cardigan it had to be.

I could have sewn this up in an afternoon after the pieces were cut, but I spent a couple of days considering what to do about the button bands. Originally I cut an interfaced band out of a different fabric, but when I went to put in buttonholes I didn't like the way the wide black band looked with the lace. After a few days' consideration, I cut the band off (unpicking black stitches on black fabric? No thanks!) and added a thinner band of self-fabric, no interfacing, no buttons or buttonholes. As a result, the cardigan is smaller. I can close it at the top with a pin. I like how it looks open when I arrange it just-so, but as you can see, the fabric is so floppy that it doesn't stay just-so.

It's a size 12, just like my first one. This fabric is a lot less stretchy than the French terry I used last time, so it's a closer fit. I sewed the whole thing entirely on my serger and coverstitch machine. I did not add the sleeve bands, instead just turned up and coverstitched with a 1/2" hem. I also lowered the neckline by about 3/4".

I recently wore the cardigan on a date night to the movies. It is the perfect weight for the theater - I would have been cold wearing just the t-shirt, but a heavier cardigan would have been too much. So, although it won't stay on straight without a pin, it has already gotten a lot of wear.

As the cardigan corner of my closet is still fairly empty, earlier this month, I made a green Lisbon out of this beautiful bamboo/lycra jersey knit. There was a fluke on the Fabric Mart web site a month or two ago, where this color of the fabric was briefly (and probably accidentally) on sale for $1.80 a yard. I bought three yards. I would have bought more, but I felt bad, like I was cheating the company or something. Later that day the price went back up to $11.99/yard but Fabric Mart honored my order, which was nice of them.
Anyway, I sewed up the cardigan in the 12 graded to the 14, just as I had the previous two times. I tried it on and was ... totally disappointed. It was way too big. Fabric choice plays such a huge role in how knits fit, and I guess the drape of the bamboo meant that I should have cut a smaller size.

Trouble was, not only had I serged all my bands on AND sewed the buttonholes and buttons on, but I had coverstitched the bottom band, too. It was well and stitched together. I was so mad. I threw the cardigan down the basement stairs and went to bed. I thought about starting over (after all, the fabric was less than $2 a yard), but I wanted to save the rest of the green fabric for another top down the road. So over the course of three days, I slowly picked out my stitching and then took my side seams in 1/2" from hem to sleeve.
MUCH better. I do wish the shoulders were narrower, but I'm not picking out any more stitches. The good thing is, now that I've sewn three of these in different knits, I should have a better idea in the future whether to cut the 12 or a smaller size, based on the fabric I am using. And given how often I reach for these, I could easily use three or four more of them.

Also seen in these photos - a new Kirsten Kimono tee (size medium with my 5" FBA and hips graded to an XL) in cotton/lycra from Fabric Mart. I wore this outfit to church last week and felt cute. It was a good day :)
I'm including the next photo (taken by my 3-year-old son) because it is the truest to the color of the fabric.


For the first one, I used a 1.5-yard cut of a J. Crew polyester jacquard stripe knit acquired last year from Fabric Mart. I had bought it to make a slouchy t-shirt, but the lace stripes were a lot more see-through in person than I thought they would be. So the fabric went back into the stash to await its destiny. When I came across it in late May, inspiration struck. Sheer fabric isn't a problem if you're always going to wear it over something. So a cardigan it had to be.

I could have sewn this up in an afternoon after the pieces were cut, but I spent a couple of days considering what to do about the button bands. Originally I cut an interfaced band out of a different fabric, but when I went to put in buttonholes I didn't like the way the wide black band looked with the lace. After a few days' consideration, I cut the band off (unpicking black stitches on black fabric? No thanks!) and added a thinner band of self-fabric, no interfacing, no buttons or buttonholes. As a result, the cardigan is smaller. I can close it at the top with a pin. I like how it looks open when I arrange it just-so, but as you can see, the fabric is so floppy that it doesn't stay just-so.

It's a size 12, just like my first one. This fabric is a lot less stretchy than the French terry I used last time, so it's a closer fit. I sewed the whole thing entirely on my serger and coverstitch machine. I did not add the sleeve bands, instead just turned up and coverstitched with a 1/2" hem. I also lowered the neckline by about 3/4".

I recently wore the cardigan on a date night to the movies. It is the perfect weight for the theater - I would have been cold wearing just the t-shirt, but a heavier cardigan would have been too much. So, although it won't stay on straight without a pin, it has already gotten a lot of wear.

As the cardigan corner of my closet is still fairly empty, earlier this month, I made a green Lisbon out of this beautiful bamboo/lycra jersey knit. There was a fluke on the Fabric Mart web site a month or two ago, where this color of the fabric was briefly (and probably accidentally) on sale for $1.80 a yard. I bought three yards. I would have bought more, but I felt bad, like I was cheating the company or something. Later that day the price went back up to $11.99/yard but Fabric Mart honored my order, which was nice of them.
Anyway, I sewed up the cardigan in the 12 graded to the 14, just as I had the previous two times. I tried it on and was ... totally disappointed. It was way too big. Fabric choice plays such a huge role in how knits fit, and I guess the drape of the bamboo meant that I should have cut a smaller size.

Trouble was, not only had I serged all my bands on AND sewed the buttonholes and buttons on, but I had coverstitched the bottom band, too. It was well and stitched together. I was so mad. I threw the cardigan down the basement stairs and went to bed. I thought about starting over (after all, the fabric was less than $2 a yard), but I wanted to save the rest of the green fabric for another top down the road. So over the course of three days, I slowly picked out my stitching and then took my side seams in 1/2" from hem to sleeve.
MUCH better. I do wish the shoulders were narrower, but I'm not picking out any more stitches. The good thing is, now that I've sewn three of these in different knits, I should have a better idea in the future whether to cut the 12 or a smaller size, based on the fabric I am using. And given how often I reach for these, I could easily use three or four more of them.

Also seen in these photos - a new Kirsten Kimono tee (size medium with my 5" FBA and hips graded to an XL) in cotton/lycra from Fabric Mart. I wore this outfit to church last week and felt cute. It was a good day :)
I'm including the next photo (taken by my 3-year-old son) because it is the truest to the color of the fabric.

I'm currently trying to decide what color fabrics to order for my next few Lisbons. I'm thinking a deep peacock blue, and maybe a yellow if I can find the right shade. I love this pattern!
Subscribe to:
Posts (Atom)