
I sewed myself a jacket. I sewed a jacket because I needed a jacket. I sewed a jacket instead of buying one because I generally find RTW jackets to be tight in the arms and too big in the shoulders, and, just for once, I wanted a jacket that actually fit me well. I think I succeeded, and I need to tell you all about it. So settle in, because this is going to be a long post.
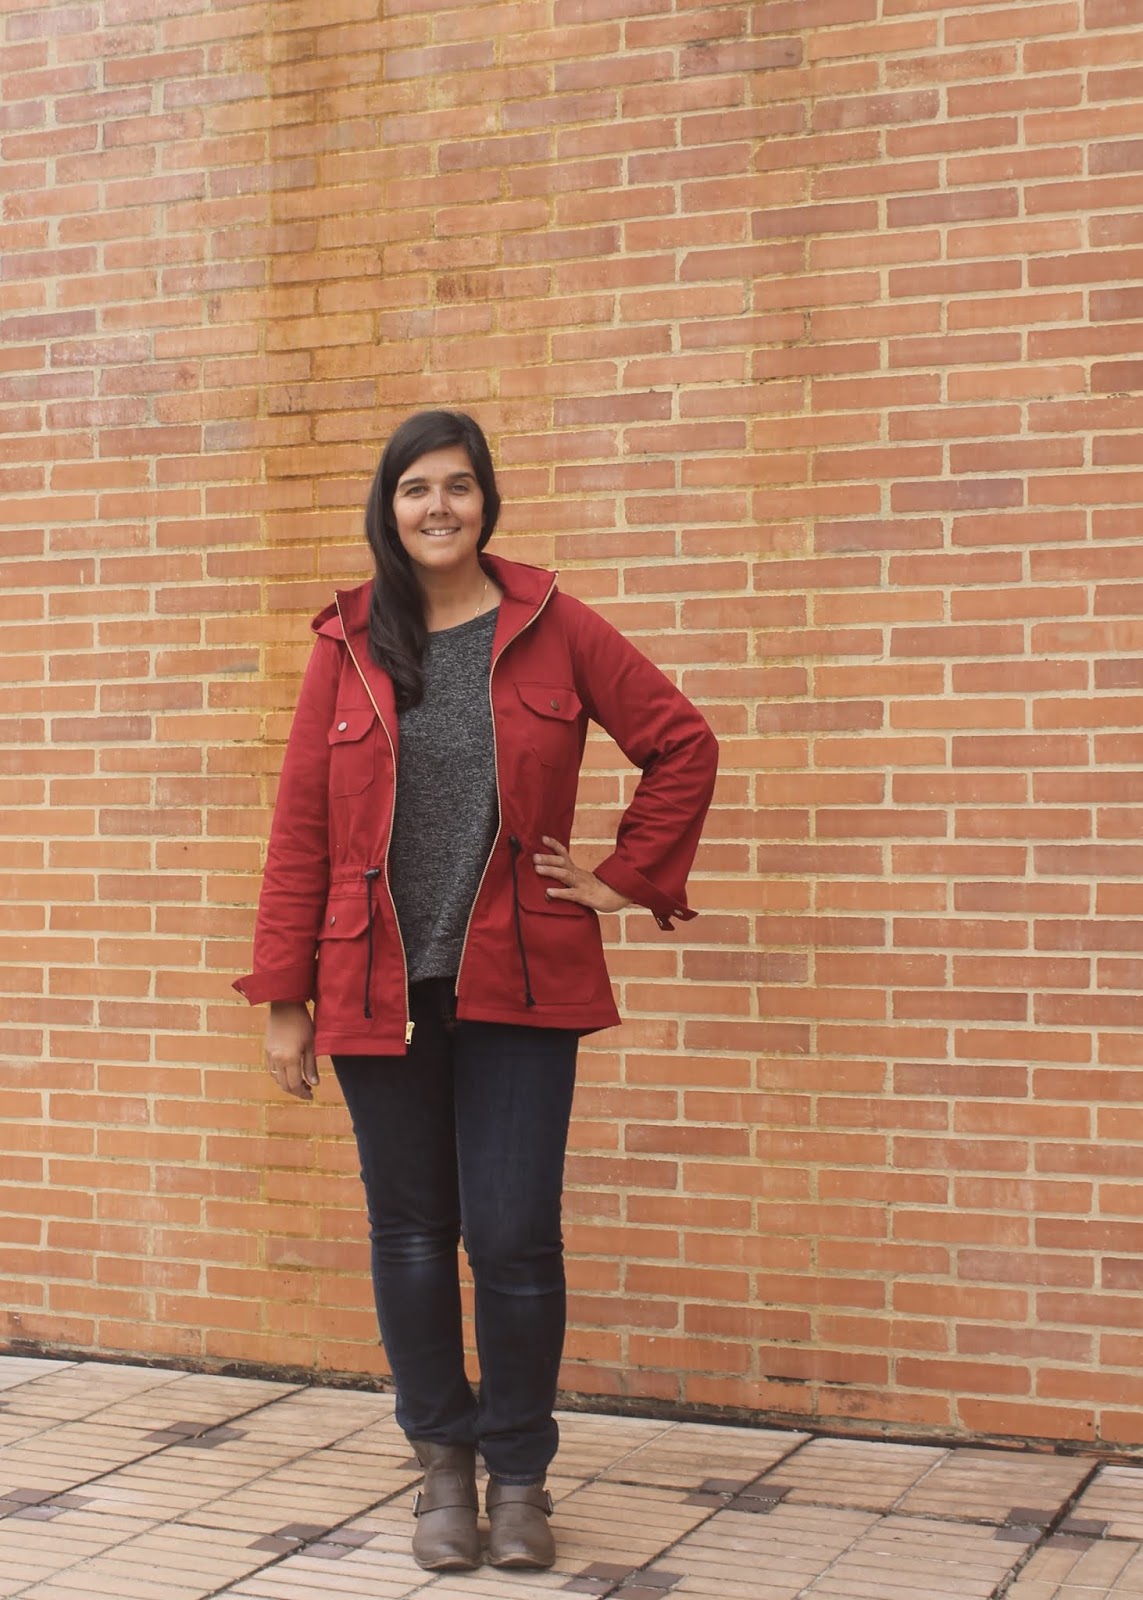
I made the Lonetree Jacket from Indiesew/Allie Olsen using this organic cotton twill from Mood. It is the second completed item from my Make Nine and I am SO happy with it.

I spent a lot of time planning this jacket, some more time procrastinating on starting it, and then about 20 hours actually assembling it over a period of two weeks. It is definitely the most involved project I've made to date. There are so many pattern pieces, and so many of those pieces need to be interfaced and/or edge-finished before you can even start putting them together.
But before that, I had to do some fitting work. I recently acquired The Complete Guide to Fitting, and so I decided to skip the muslin in favor of the book's tissue-fitting method.
Originally, I traced off a size M graded to an XL waist/hip for my 36.5 (high bust)-41-32-42 self. I did a 5/8" high round back adjustment and a 1" FBA, and then pinned and tried on my pattern. Whomp whomp. It was too small. I went back and looked at the finished measurement chart, to which I guess I hadn't paid enough attention before. It was clear that I had chosen the wrong size - and not done a large enough FBA to boot. Sigh. I gritted my teeth and retraced the approximately 18,000 pattern pieces.

The tissue fitting indicated that the jacket fit, and the back neck seam appeared to be in the right place, so I skipped the high round back adjustment this time. That was a mistake. You can see in the photo above that the hemline dips in the back - which I think indicates that I actually did need that adjustment. I don't know why it seemed in the tissue fitting that I did not need it. Guess I should have made an actual muslin.

After my tissue fitting and measuring my arms, I decided to do a 1.5" full bicep adjustment on the size L sleeve. I also used the largest size for the upper pockets and the lower pocket flaps, and I added an inch in length to the largest size of the lower pockets, to be sure my cell phone would fit.
I didn't follow the pattern markings for the pockets or the drawstring casing, but just decided where I wanted them after I sewed the bodice and sleeves together.

I decided to Hong-Kong-seam the inside of the jacket. I made bias binding out of the leftovers of the flannel voile that I used to make this shirt. Unfortunately, when I went to attach my beautifully bound front facings, I realized that I had accidentally cut them in the size M that I had originally traced off, instead of the L that I was actually going to sew. I had just enough fabric left to cut new facings but no more bias tape. At this point I was a good 18 hours into the 20 hours that I would spend on this project, and had zero motivation to make more bias tape. So I serged the edges instead. It would be nicer if they were Hong Kong seamed as well, but I don't wear the jacket any less because the edges are overlocked.

Right after I attached my serged-edge facings, I noticed the folds in the sleeves. I am sure that this issue presented itself in the (multiple) tissue fittings that I did of this jacket before sewing it. But my eye just wasn't trained to look for/see it as a problem. It was only when I was nearly done with the jacket and tried it on, that suddenly all I could see was the fold twisting down from my mid-bicep around to my wrist. What the heck was that? Below you can see the photo I shared on IG mid-construction, with a pronounced fold on the sleeve.

The Complete Guide to Fitting suggested that I rotate the sleeve in the armscye until the wrinkles smoothed out. I tried that. It didn't really help. Then I thought maybe the sleeve was just too big (it was; I'm not sure why I did that bicep adjustment), so I took each sleeve in 1.25". The sleeve fit better but the folds were still there. So then I took out some of the sleeve cap ease, thereby almost entirely undoing my full bicep adjustment. I pinned it back in. It looked a bit better. So I basted both sleeves in. Argh, still folds! I didn't know what else to do with it, so I went online and re-looked at the 200+ pictures of the Lonetree Jacket on IG and then decided to just let well enough alone.
Thanks to some input from Teri, I now think the folds are caused by an outwardly rotated elbow. I've gone back and had a look at pretty much every garment I've ever sewn myself, only to find that I have this problem A LOT. I've just never noticed it before.

Interestingly, most of the garments in which I did not have this problem are garments designed by Liesl Gibson (though the issue is present in the black Portfolio Dress above, which is from Liesl's old Simplicity range). See below from left to right, the Late Lunch Tunic, the Gallery Tunic and the Traveler tunic - all fold-free, though they are also all closer-fitting sleeves than the above. I will need to take a look at those sleeve pattern pieces as compared to the ones above.


So, is it a fit issue that I am going to try to conquer in the future? Absolutely. Am I going to buy more fabric to make new sleeves for this jacket? Probably not. First of all, the fabric has relaxed a bit as I've been wearing it, and while the folds are still there, they are much less severe than when I first noticed them (I can barely even see them in these photos!). And secondly, I am trying to adopt the attitude that "good enough is good enough," and not belabor minor fit issues in what are otherwise perfectly wearable garments.
And this is a perfectly wearable garment, as I've demonstrated by wearing it almost every single day since I finished it.

There are a couple of things I would do differently if I ever make this again (and I hope this jacket will last me years and years so that I won't have to):
1) The hood is a bit skimpy. I did not tissue-fit it (and I'm not sure I would have noticed the issue if I had). But I do have a large-ish head, and I find that the hood could use another inch or so in height as well as in depth. As I don't usually wear it up, this is ok. I self-lined the hood because I didn't want any visible contrast, but I think I would have preferred it to be slightly lighter. As it is, the double thickness of cotton twill has a little too much body, but maybe it will loosen up with age.
2) I had trouble visualizing how the jacket was going to come together in the front. The pattern has you finish the center front bodice seam allowance before construction, and, as I thought those seam allowances would be visible, I finished them with bias tape. In fact, this is the seam allowance that is directly underneath the zipper, so it was not an appropriate finish, and it adds a bit of bulk.
3) I really need a tailor's ham, a clapper and Wonder Clips. I don't own any of these things and have never suffered for lack of them before, but I really could have used them during this project (and will be adding them all to my birthday wish list). The clips in particular would have saved me about 20 bent pins.
Finally, I'm not sold on the black drawstring and cord stops, but I have a matching cord and antique gold cord stops on the way with the intention of switching them out.

And I think that's all I have to say about that. If you made it this far, you're a trooper! As always, thanks for reading, and see you next time.
Nice jacket! Good job with it. I have exactly the same issue with my arm, but I think it is a result of a having a forward shoulder versus being a separate issue distinct from forward shoulder. Often, you see advice about adjusting the shoulder seam for a forward shoulder, but rarely see the advice to adjusting the sleeve to go with that change to the shoulder seam. There's a good photo here of how the top of the arm is rolled forward too with a forward shoulder:
ReplyDeletehttps://www.mariadenmark.com/2012/08/forward-shoulder-alteration/
So the sleeve needs to be adjusted too.
I usually use a short cut which works well enough for me -- shaving a bit off the front lower edge of the sleeve cap, so there is less volume on the front of the sleeve at the front of the sleeve just below the shoulder. But there are more official ways to do this adjustment:
http://handmadebyheatherb.blogspot.com/2013/10/forward-shoulder-adjustments-for-sleeves.html
https://www.threadsmagazine.com/2016/02/19/video-adjusting-a-sleeve-for-a-forward-shoulder
https://mellysews.com/2018/10/shoulder-fitting-adjustments-when-sewing.html
(Under the 'forward shoulder adjustment' section of the text)
Good luck! It's fun to get better and better with sewing and fitting skills and see the improvement in our finished product. Thank goodness for the Internet for learning new things!
Thanks for this advice! As it turns out, I have been doing forward shoulder adustments for years (and also adjusting the sleeve) - some of the garments I posted with my arm wrinkles are forward-shoulder-adjusted. But it never actually fixed the problem that I was trying to fix, which was that my tops slide backwards on my shoulders. I couldn't figure out why until I started reading The Complete Guide to Fitting, but now I think my shoulder issue is actually a high round back (which of course I didn't end up adjusting for in this project). But you are right, a lot of tutorials for forward shoulder don't mention to adjust the sleeve, which you do need to do. Thanks for reading!
DeleteThis is a fabulously well made jacket. You should feel very proud of yourself!
ReplyDeleteLee, UK.
1st: http://gksagenda.blogspot.com/2015/12/arcane-adjustment.html
ReplyDeleteI've never done this adjustment that Gail illustrates here but looking at my jacket makes, the fold is present on almost every 1-piece sleeve coat/jacket and NONE of the 2-piece sleeve coat/jackets. I wonder if it's something that happens when that curvature is lost that you get with the 2-piece sleeves.
2nd: THIS IS FANTASTIC! I love the color and the new cord stops will really pop.
Thanks for all the details about the journey!
Interesting! This is a two-piece sleeve, but it's shaped differently than the two-piece sleeve that I saw in The Complete Guide to fitting. It is also the first time I have ever sewn a two-piece sleeve so I don't really know what I'm looking at, but I thought maybe there was a way to fix the problem using the extra seam, that I didn't know about.
Deleteyour jacket looks great,love the color on you. I think the adjustment you need is not because of any elbow issue, it is that you need more sleeve cap height. If you make a muslin and draw the horizontal balance lines on it I bet you will see the lines round upwards at the bicep and if you detach the sleeve at the shoulder it will drop down and relax. The best image I've ever seen on this is in the Sarah Veblen book: The Complete Photo Guide to fitting. In a close fitting armhole in a woven fabric it will feel like there is something wrong after you attach the sleeve but this may solve it.
ReplyDeleteWow, your fitting knowledge and technique blows me away. You put a lot of work into this and I hope you wear it for many years to come.
ReplyDeleteWOW. This is simply beautiful work! Well done! Also, you look phenomenal.
ReplyDeleteThank you :)
Delete